Brighfield/Transmitted Light scanning
Power Up:
Check Antivibration table legs - There should be a ~3 to ~7 mm gap between top of metal ring and bottom to rubber ring at each leg. Adjust red knob(s) 1/8th of a turn and wait ~30 seconds and then recheck gap. Rotating red knob clockwise gives a bigger gap.
![]()
Start VS200 ASW 200 software
Home Screen:
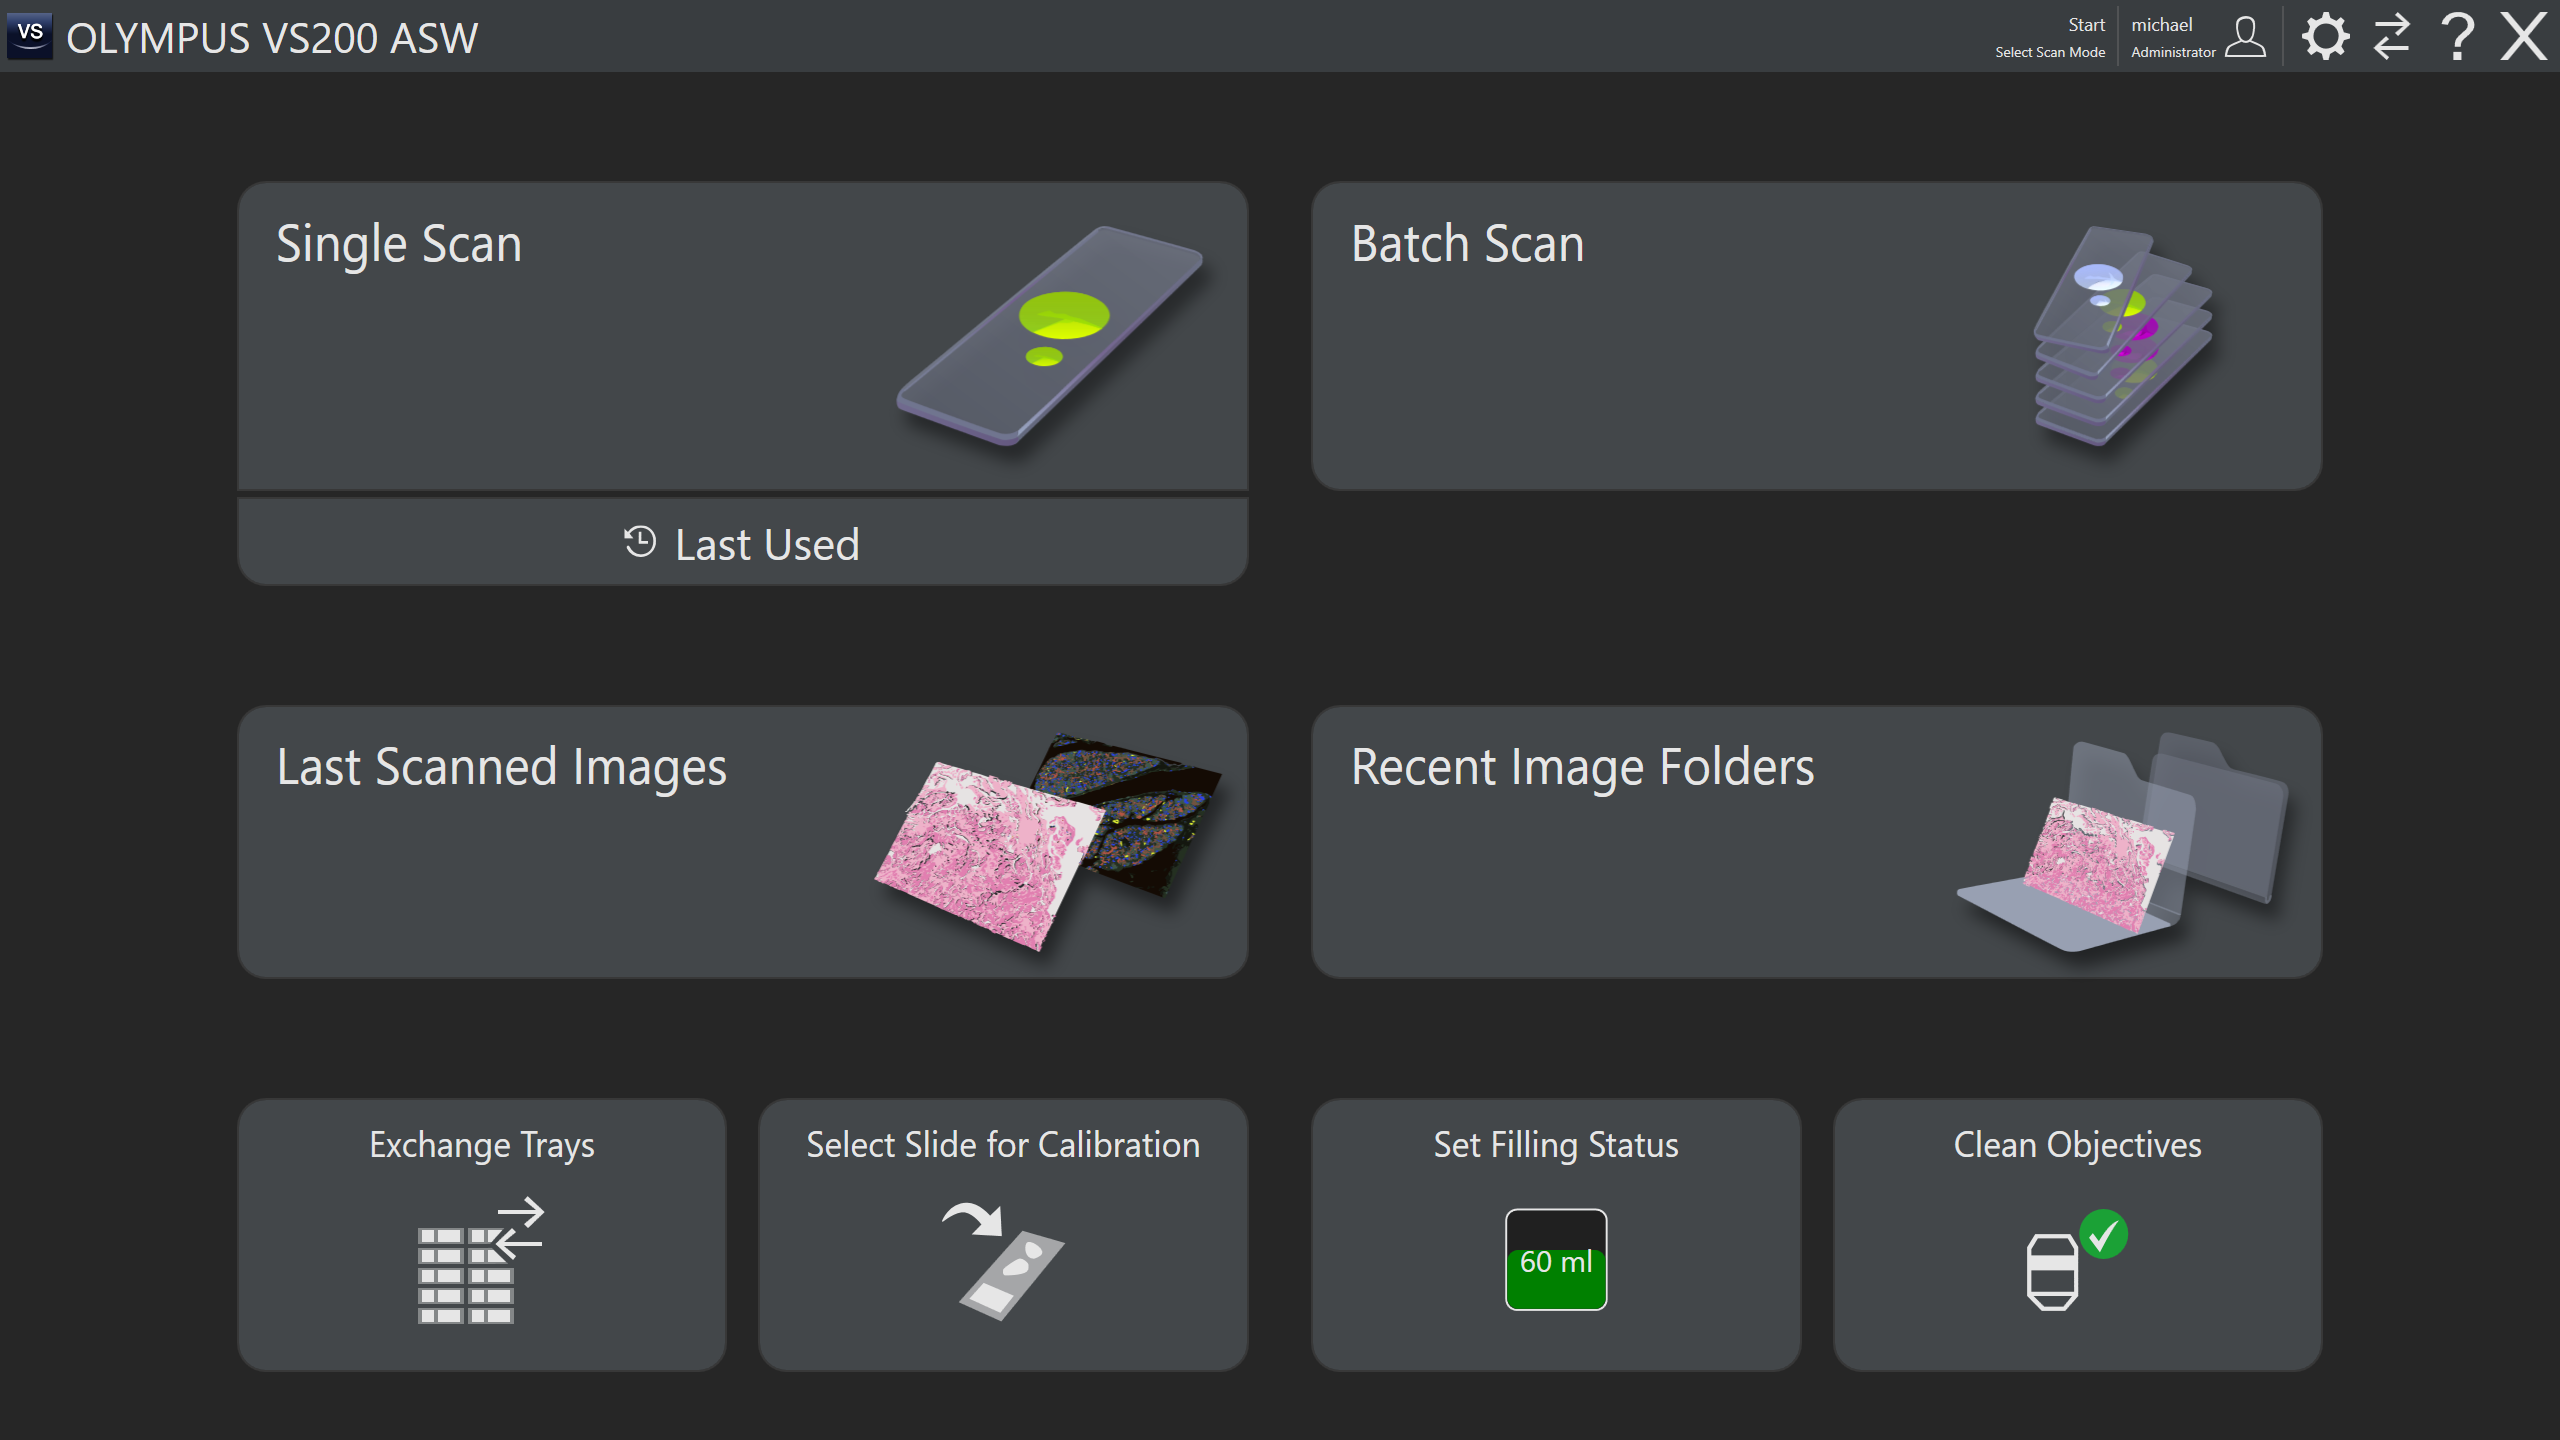
Clean objective if previous use included any slides with immersion oil
(currently unlikely)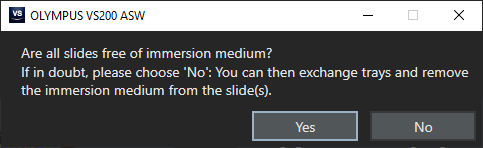
Otherwise choose "Yes"
("No" can also be chosen to change trays)
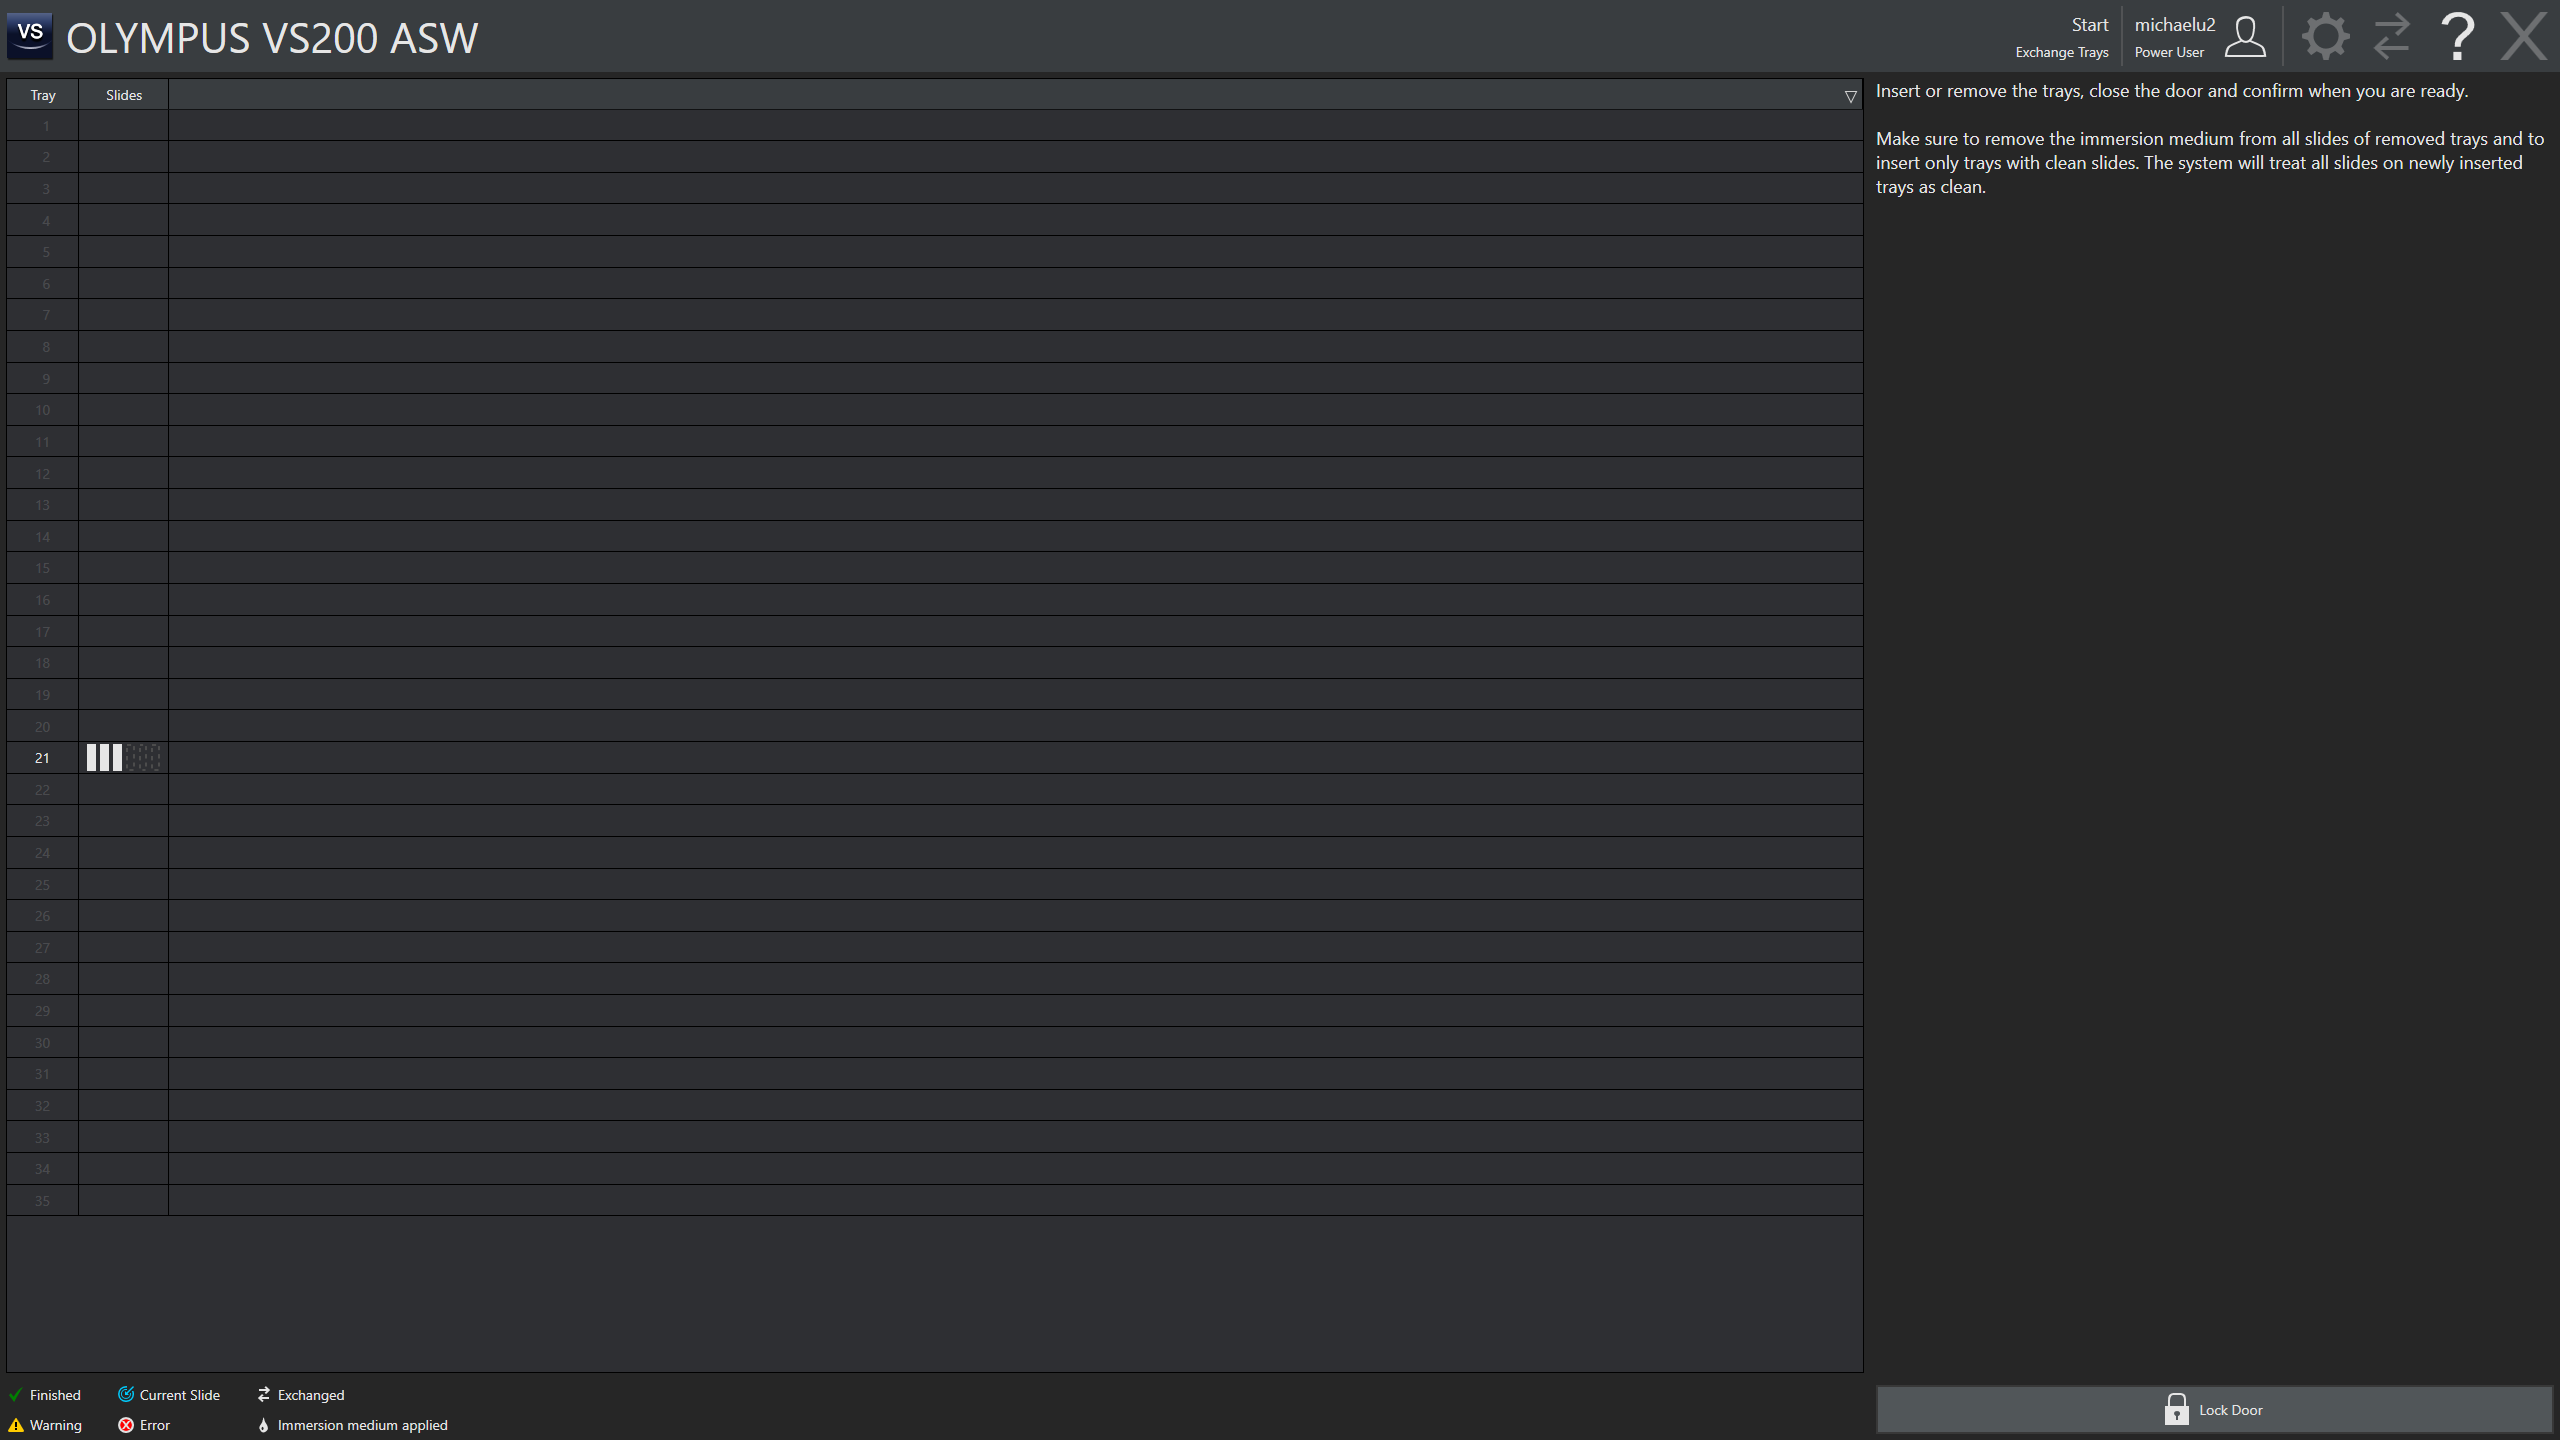
Exchange Trays:
Note correct orientation of 6 slide tray
Load clean slides with coverslip up & slide label to the back
Insert tray gently into hotel and push tray to left (THIS IS IMPORTANT!)
Note: 40X Objective Correction Collar:
Use the "Clean objectives" to access the 40x objective inside the smaller box to the left
Set to 0.17 (mm) for #1.5 coverslips
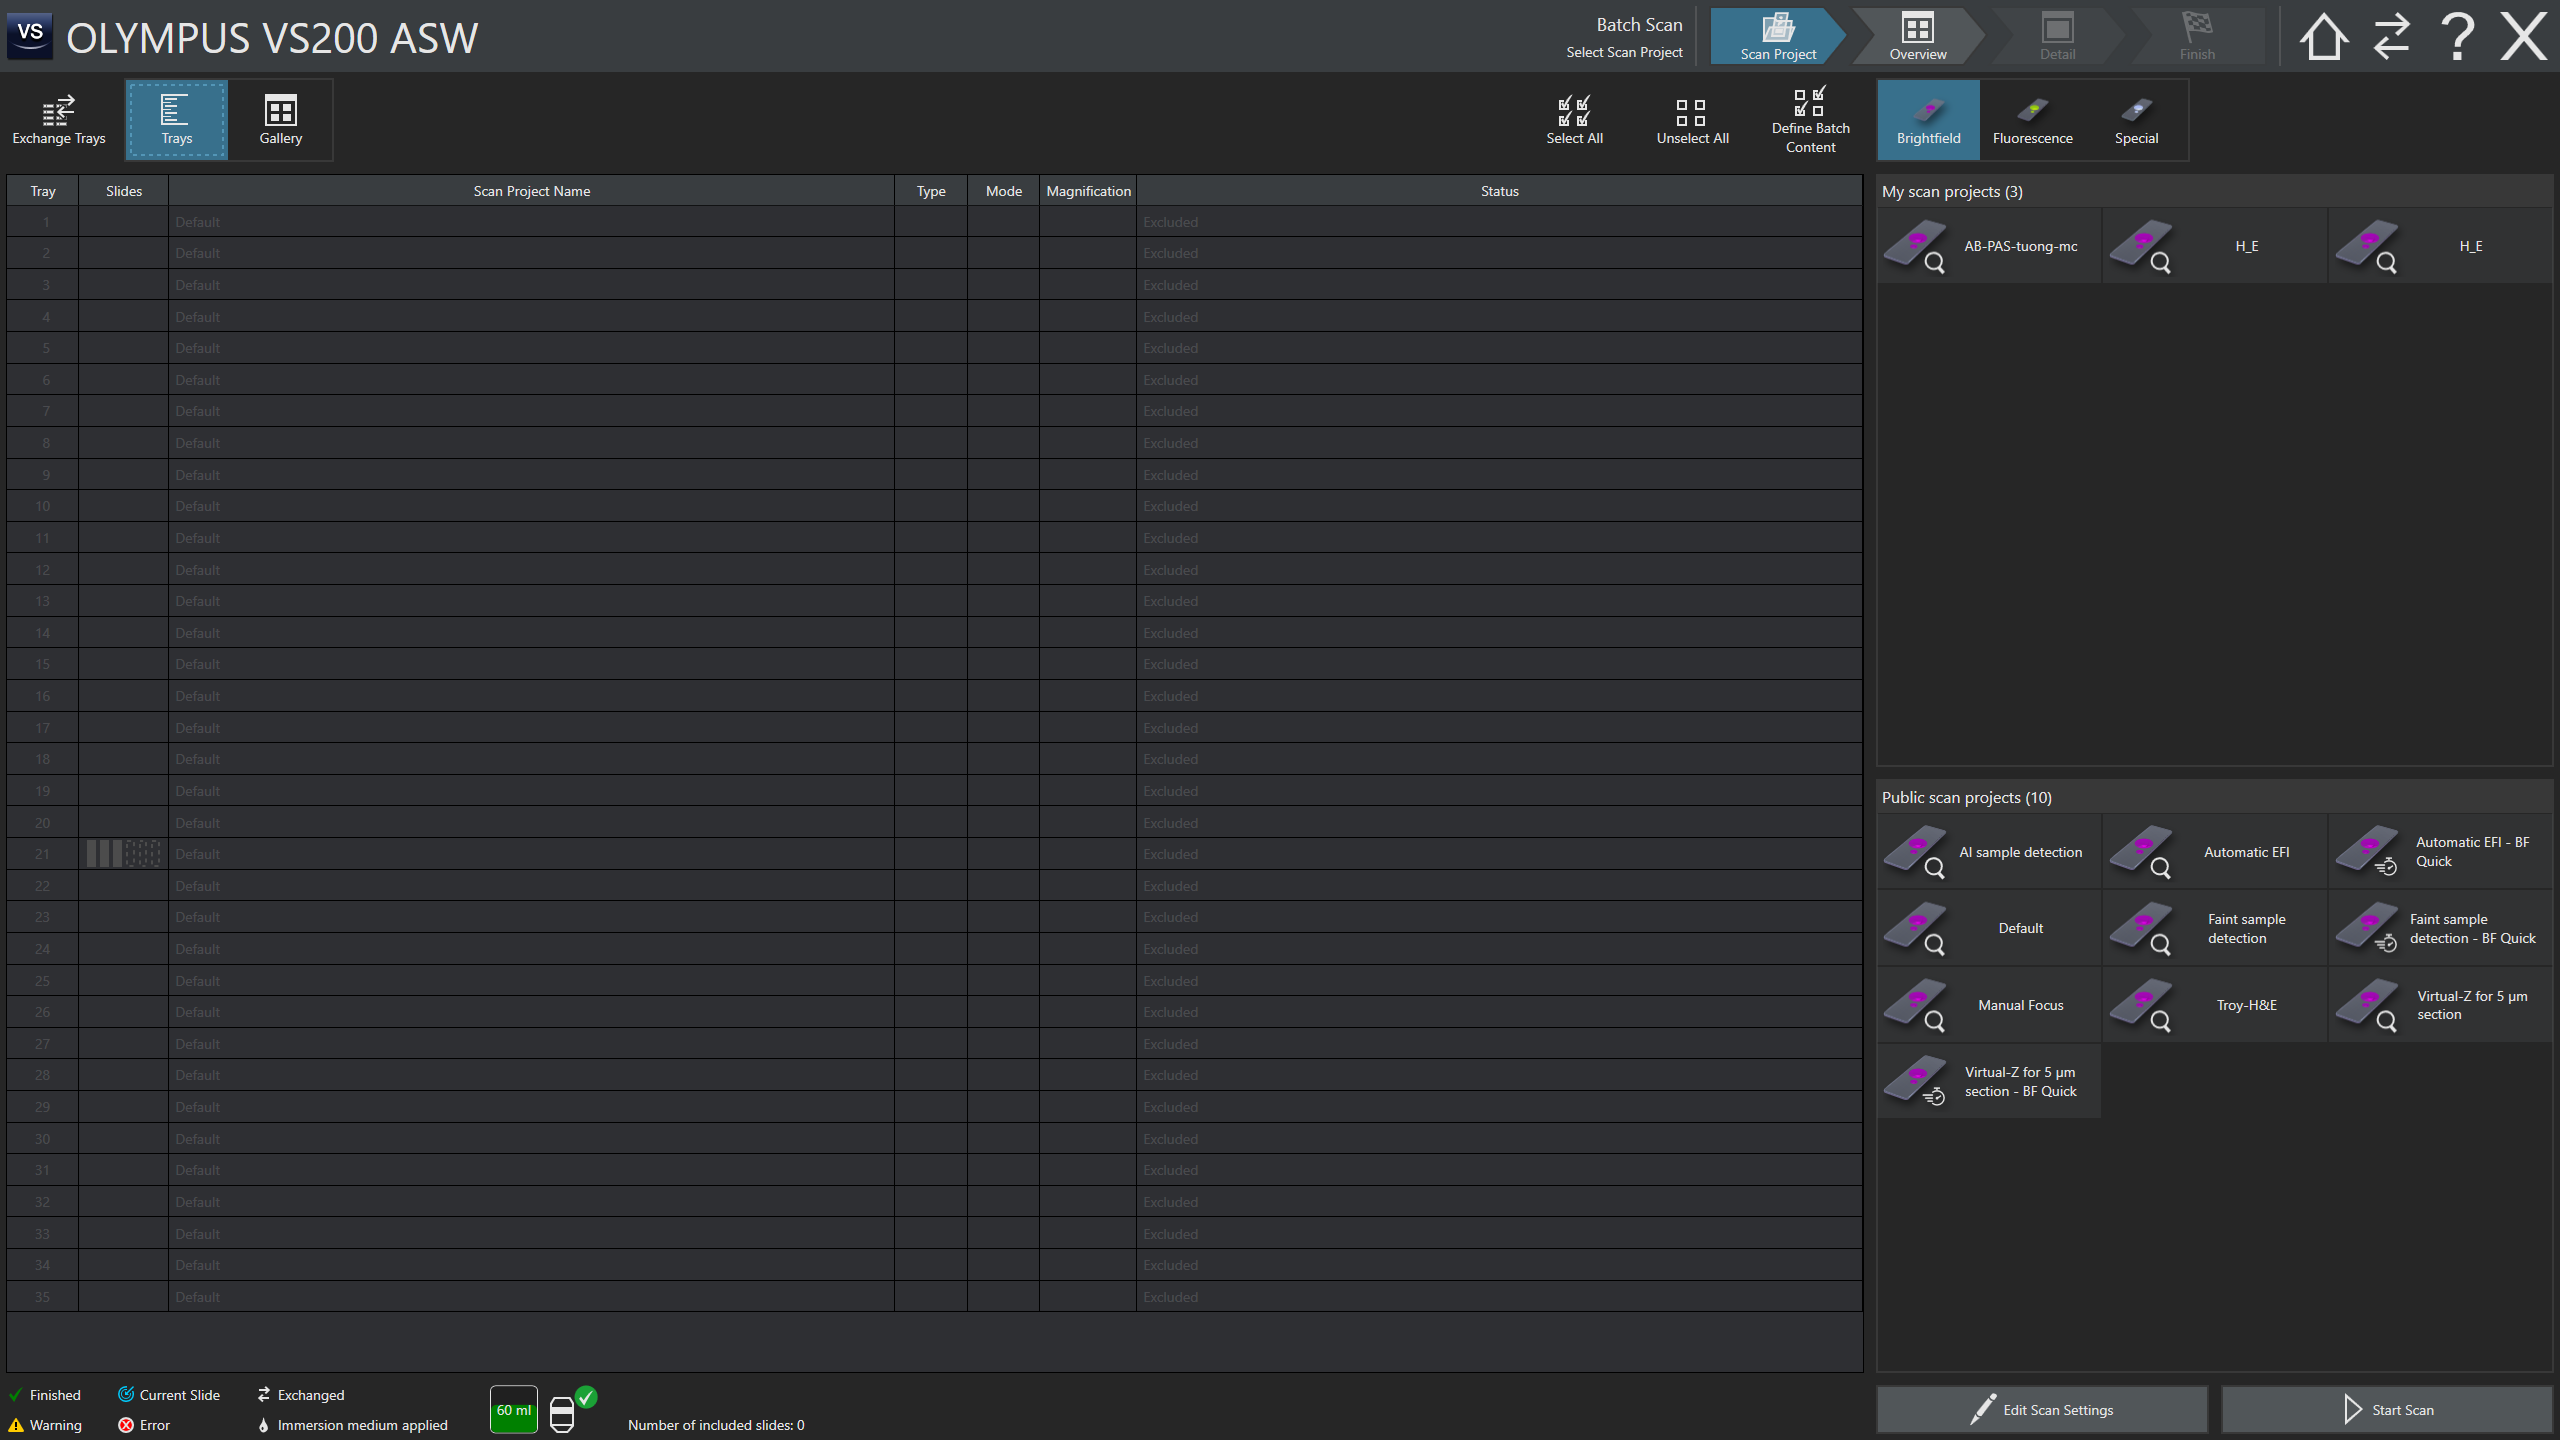
Scan Project:
Select "Brightfield"
Click on first Tray in left hand column of numbers
Skip to Gallery - unless many trays in hotel need to be excluded. Then use "Tray" selection
 Select
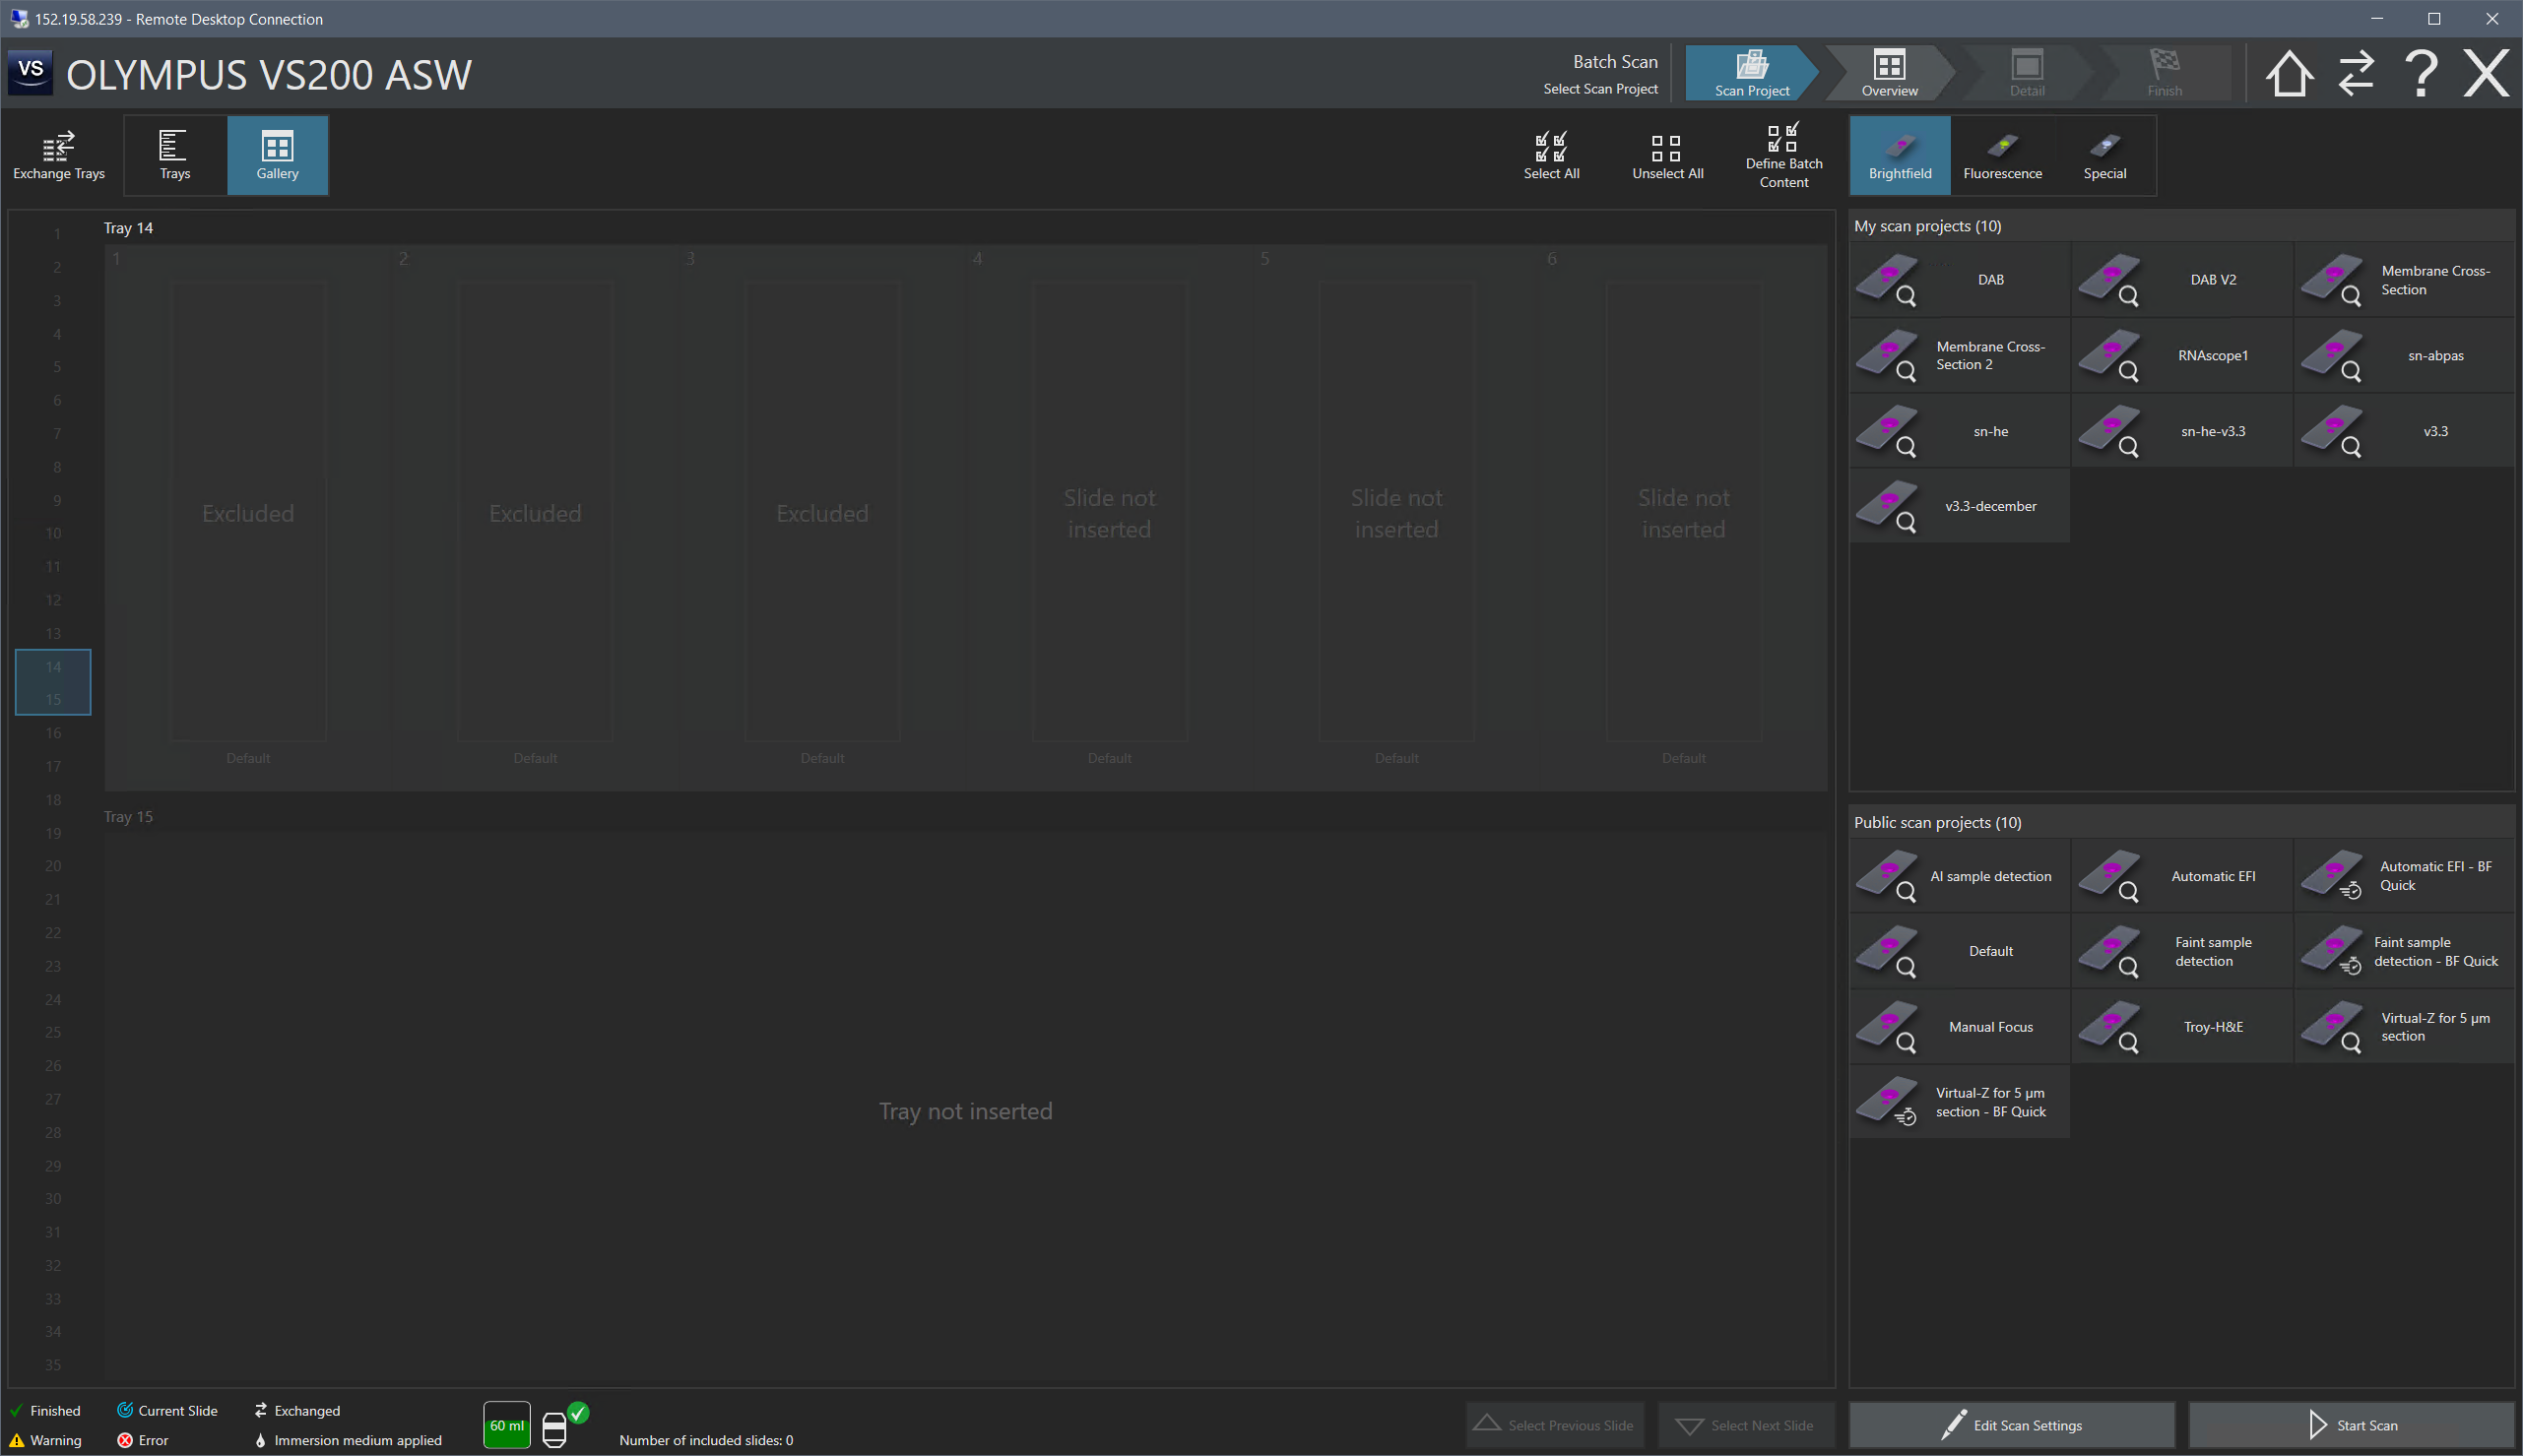
Gallery
Select
Gallery
Select Brightfield | Fluorescence | Special
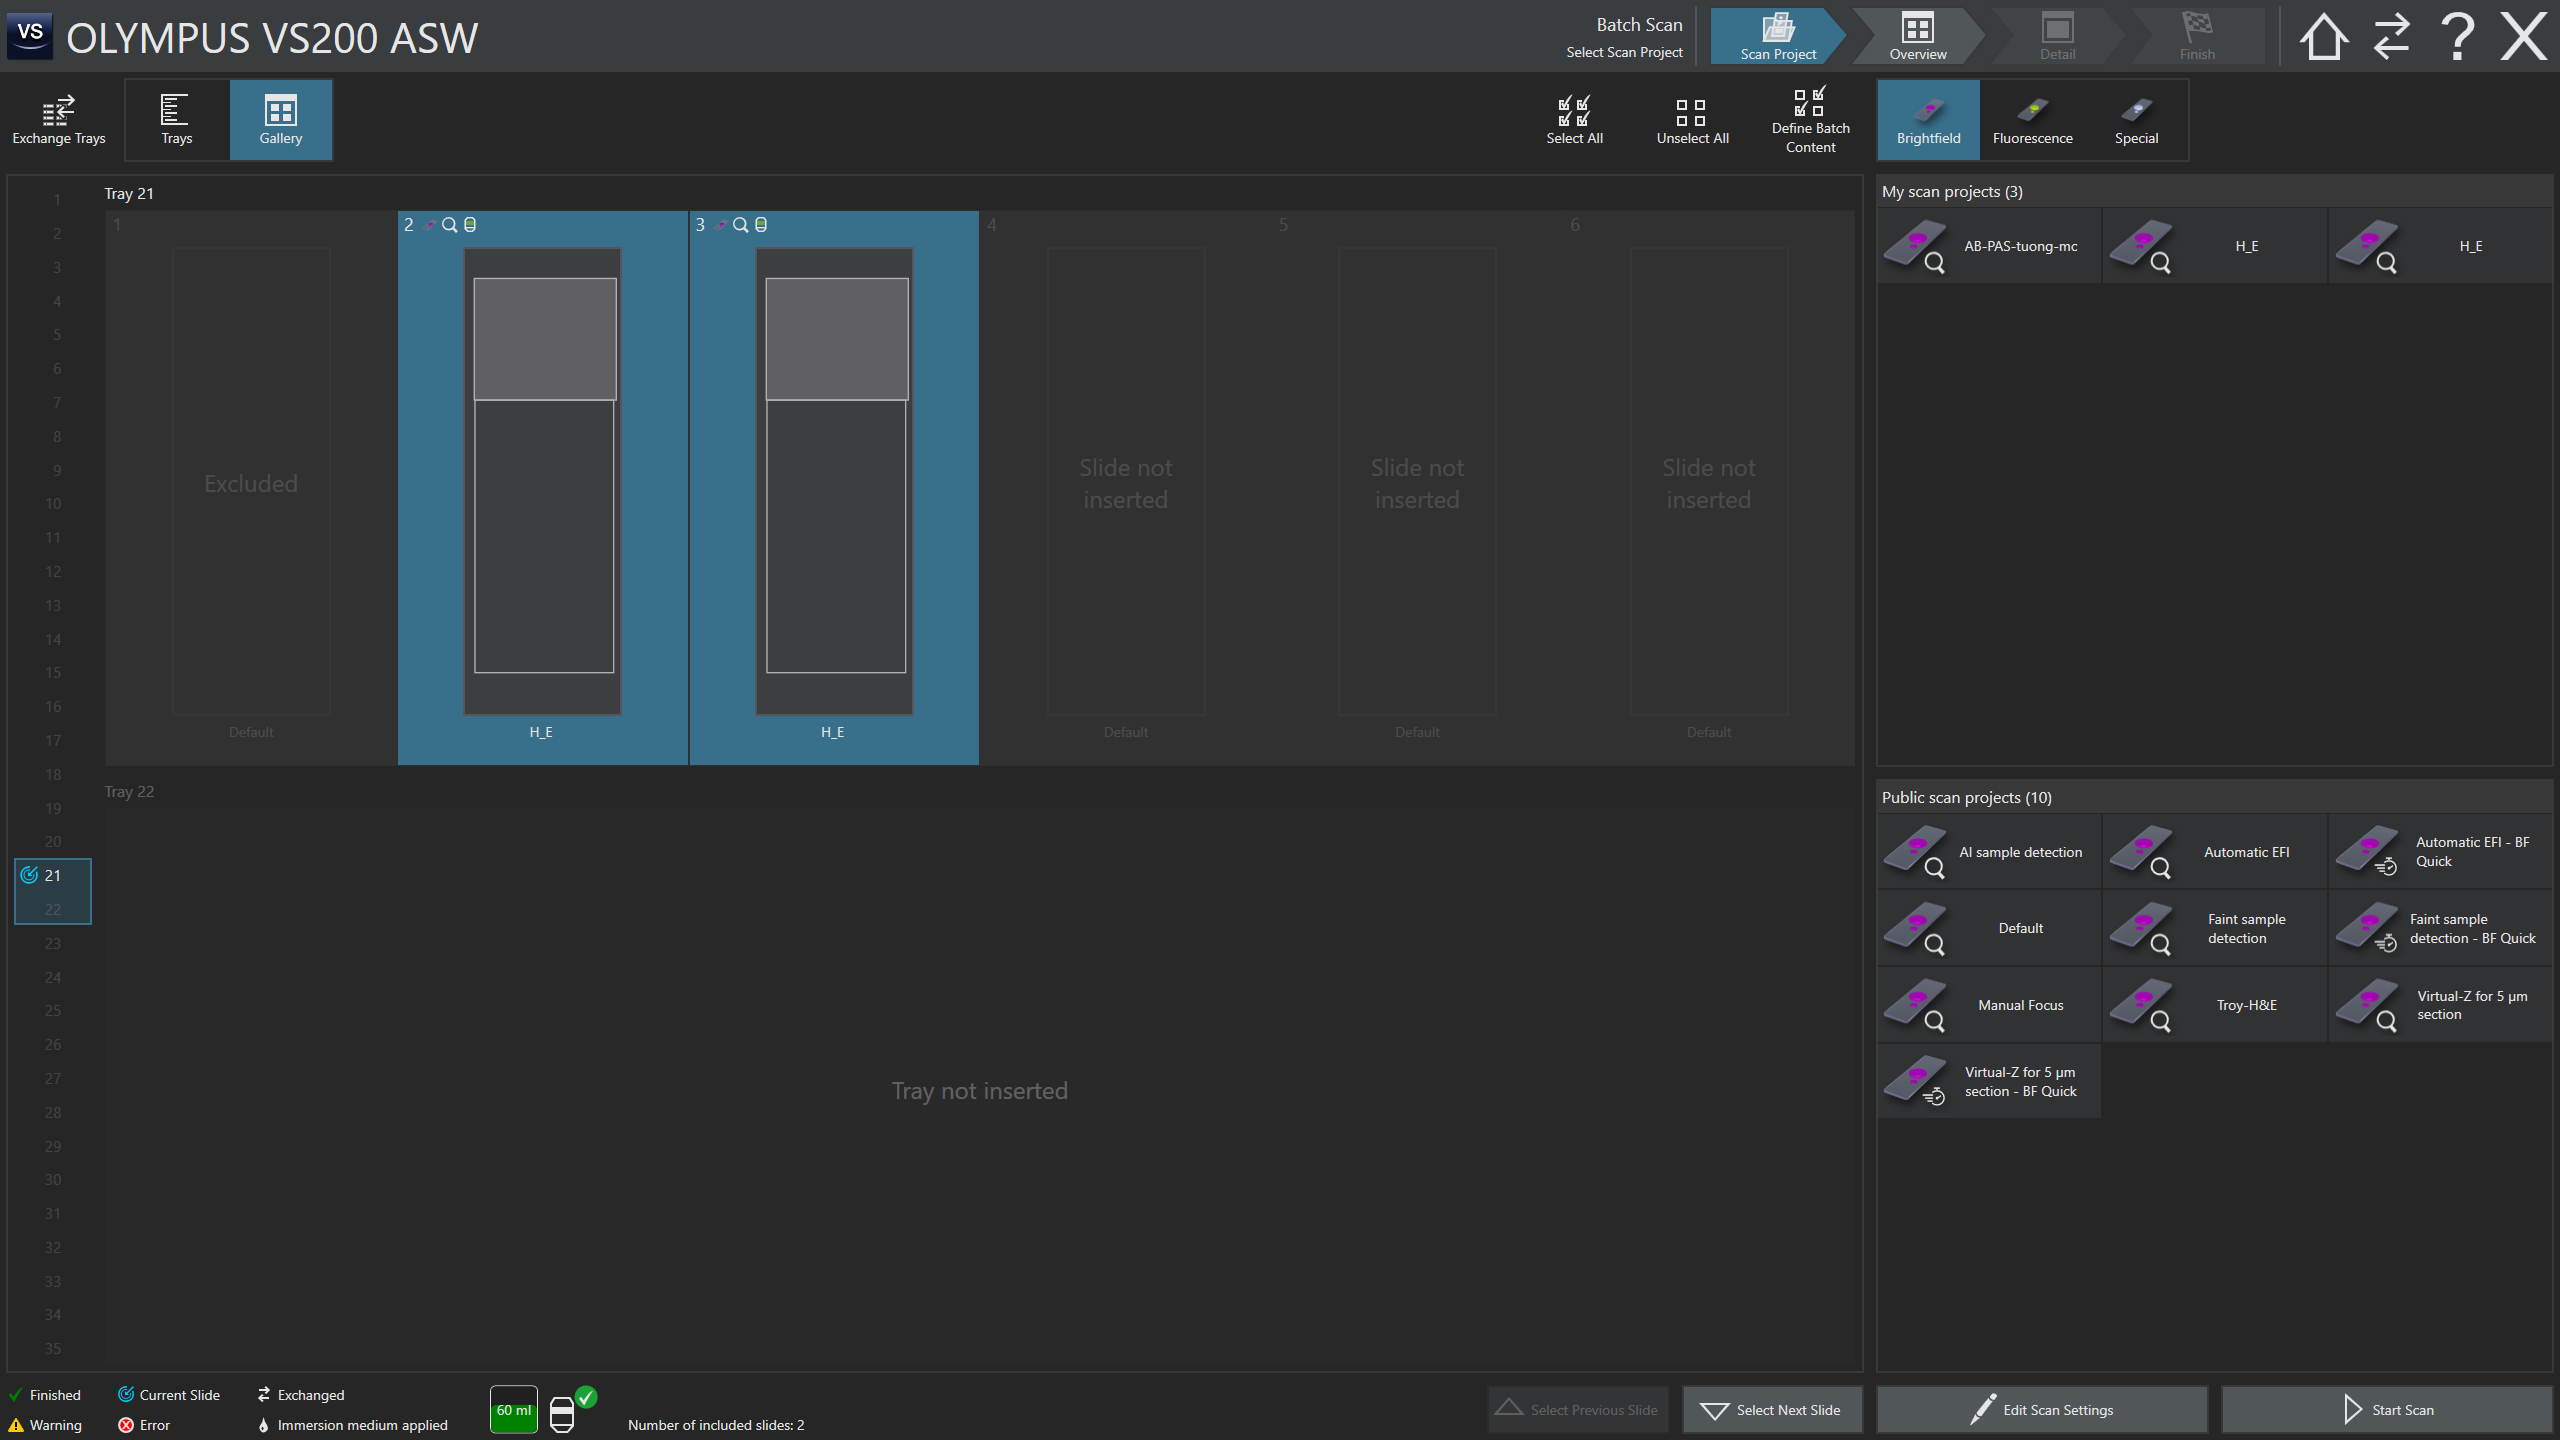
Select slides
left_click on 1st slide, hold shift, left_click on last slide
&/or control +left_mouse_click to toggle slide selection on or off
chosen a project to apply project to selected slides
Hit "Edit scan settings" to get to overview mode
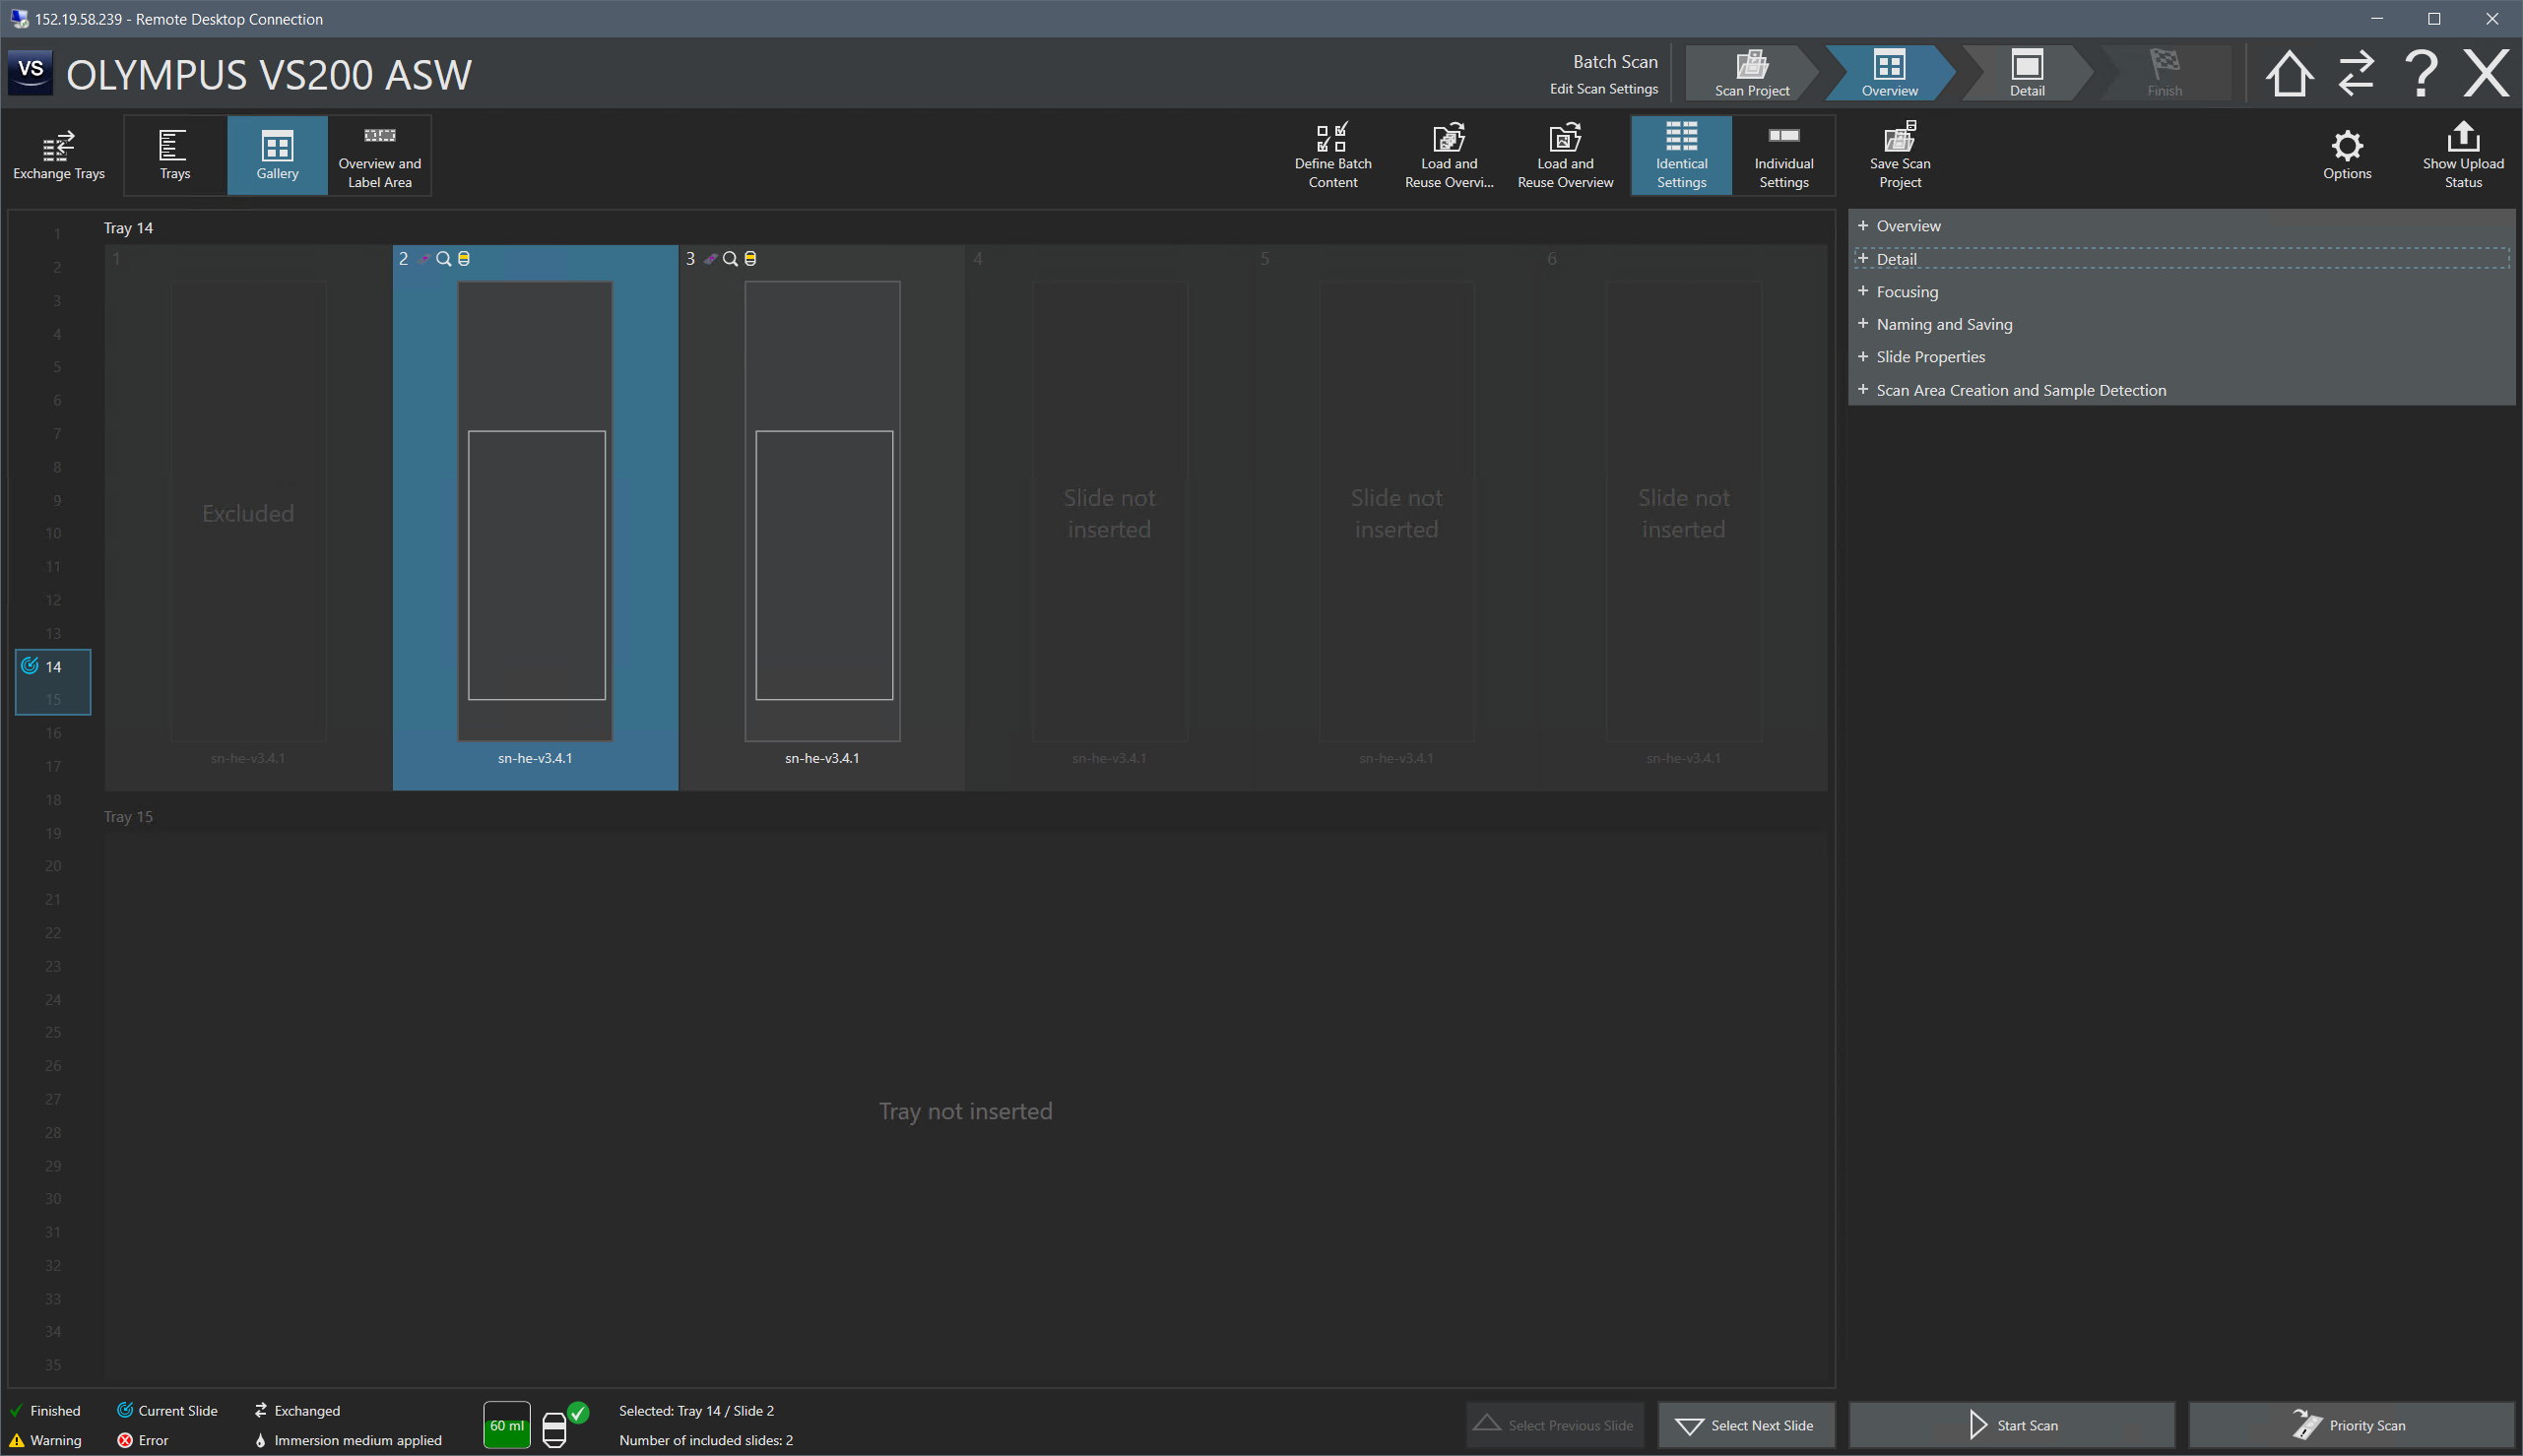 Overview mode:
+Overview
+Detail
+Focusing
+Naming and Saving
+Slide properties
+Scan Area Creation and Sample Detection
Check through and change if necessary:
- Overview
"Expert"
"Scan Label"
-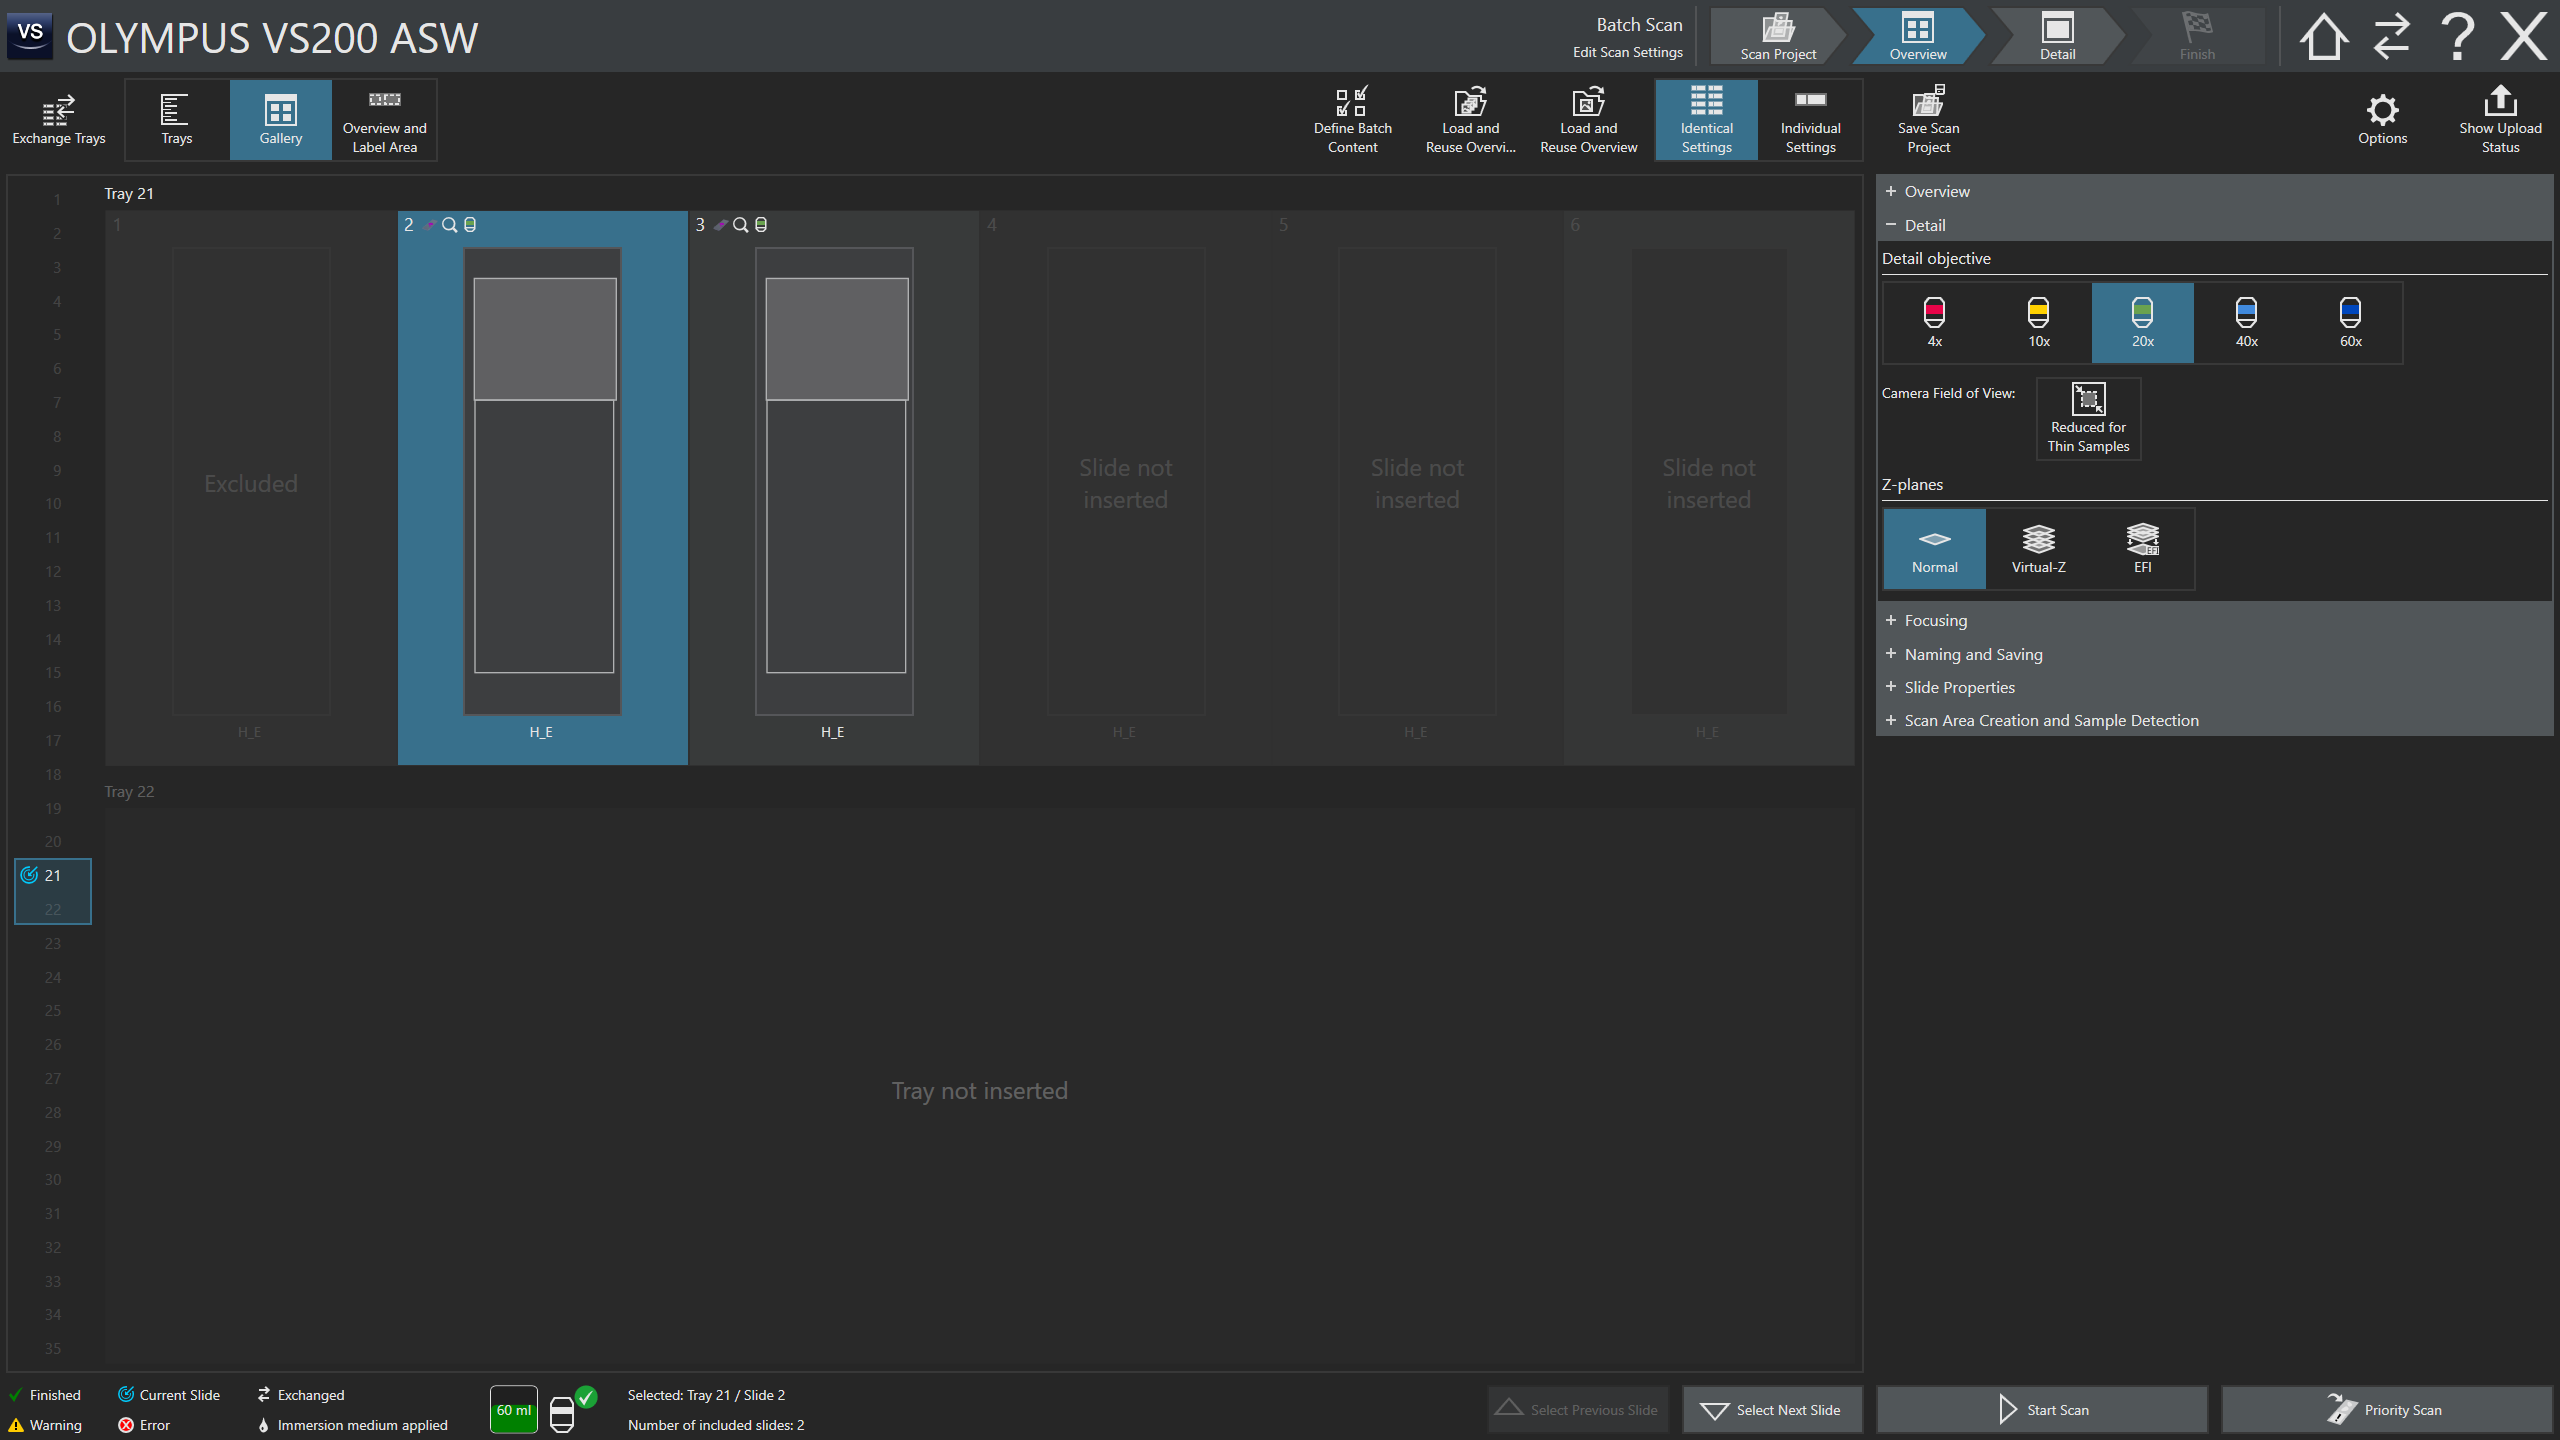 Detail
Choose object magnification
If 40x check that correction collar is set to correct coverslip thickness (usually 0.17 mm)
Z-planes - usually "Normal" (one plane)
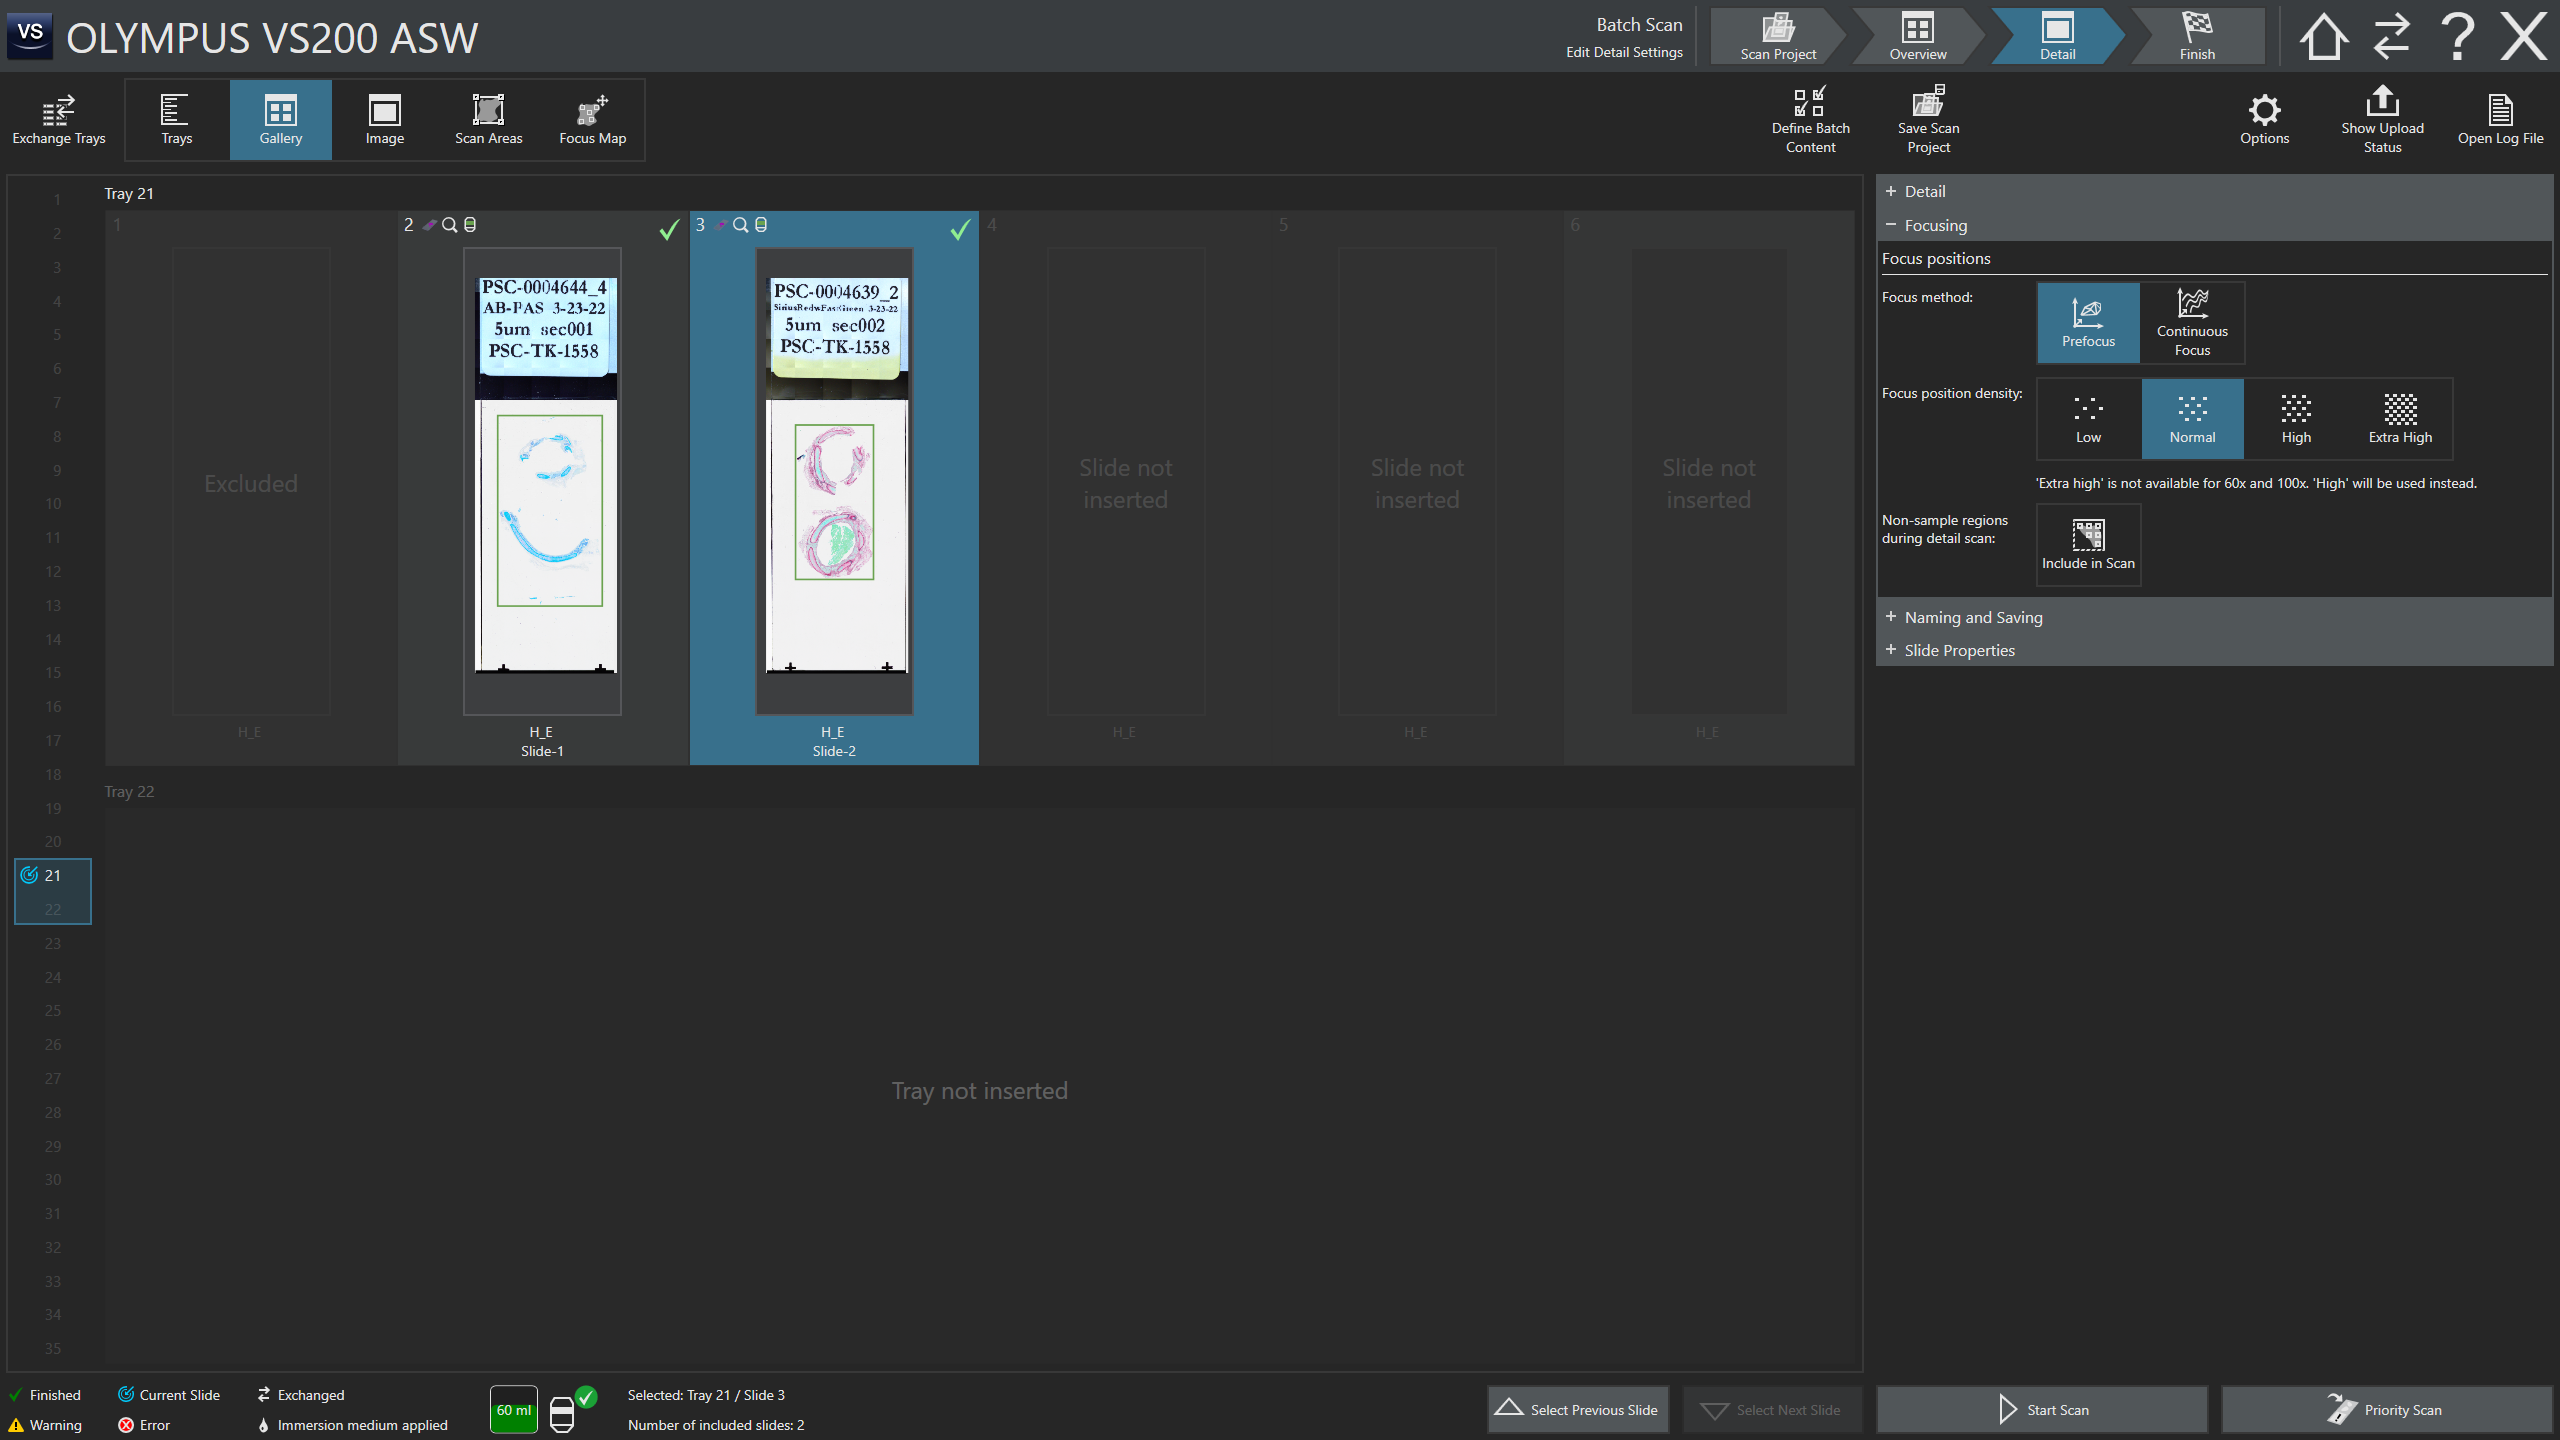
-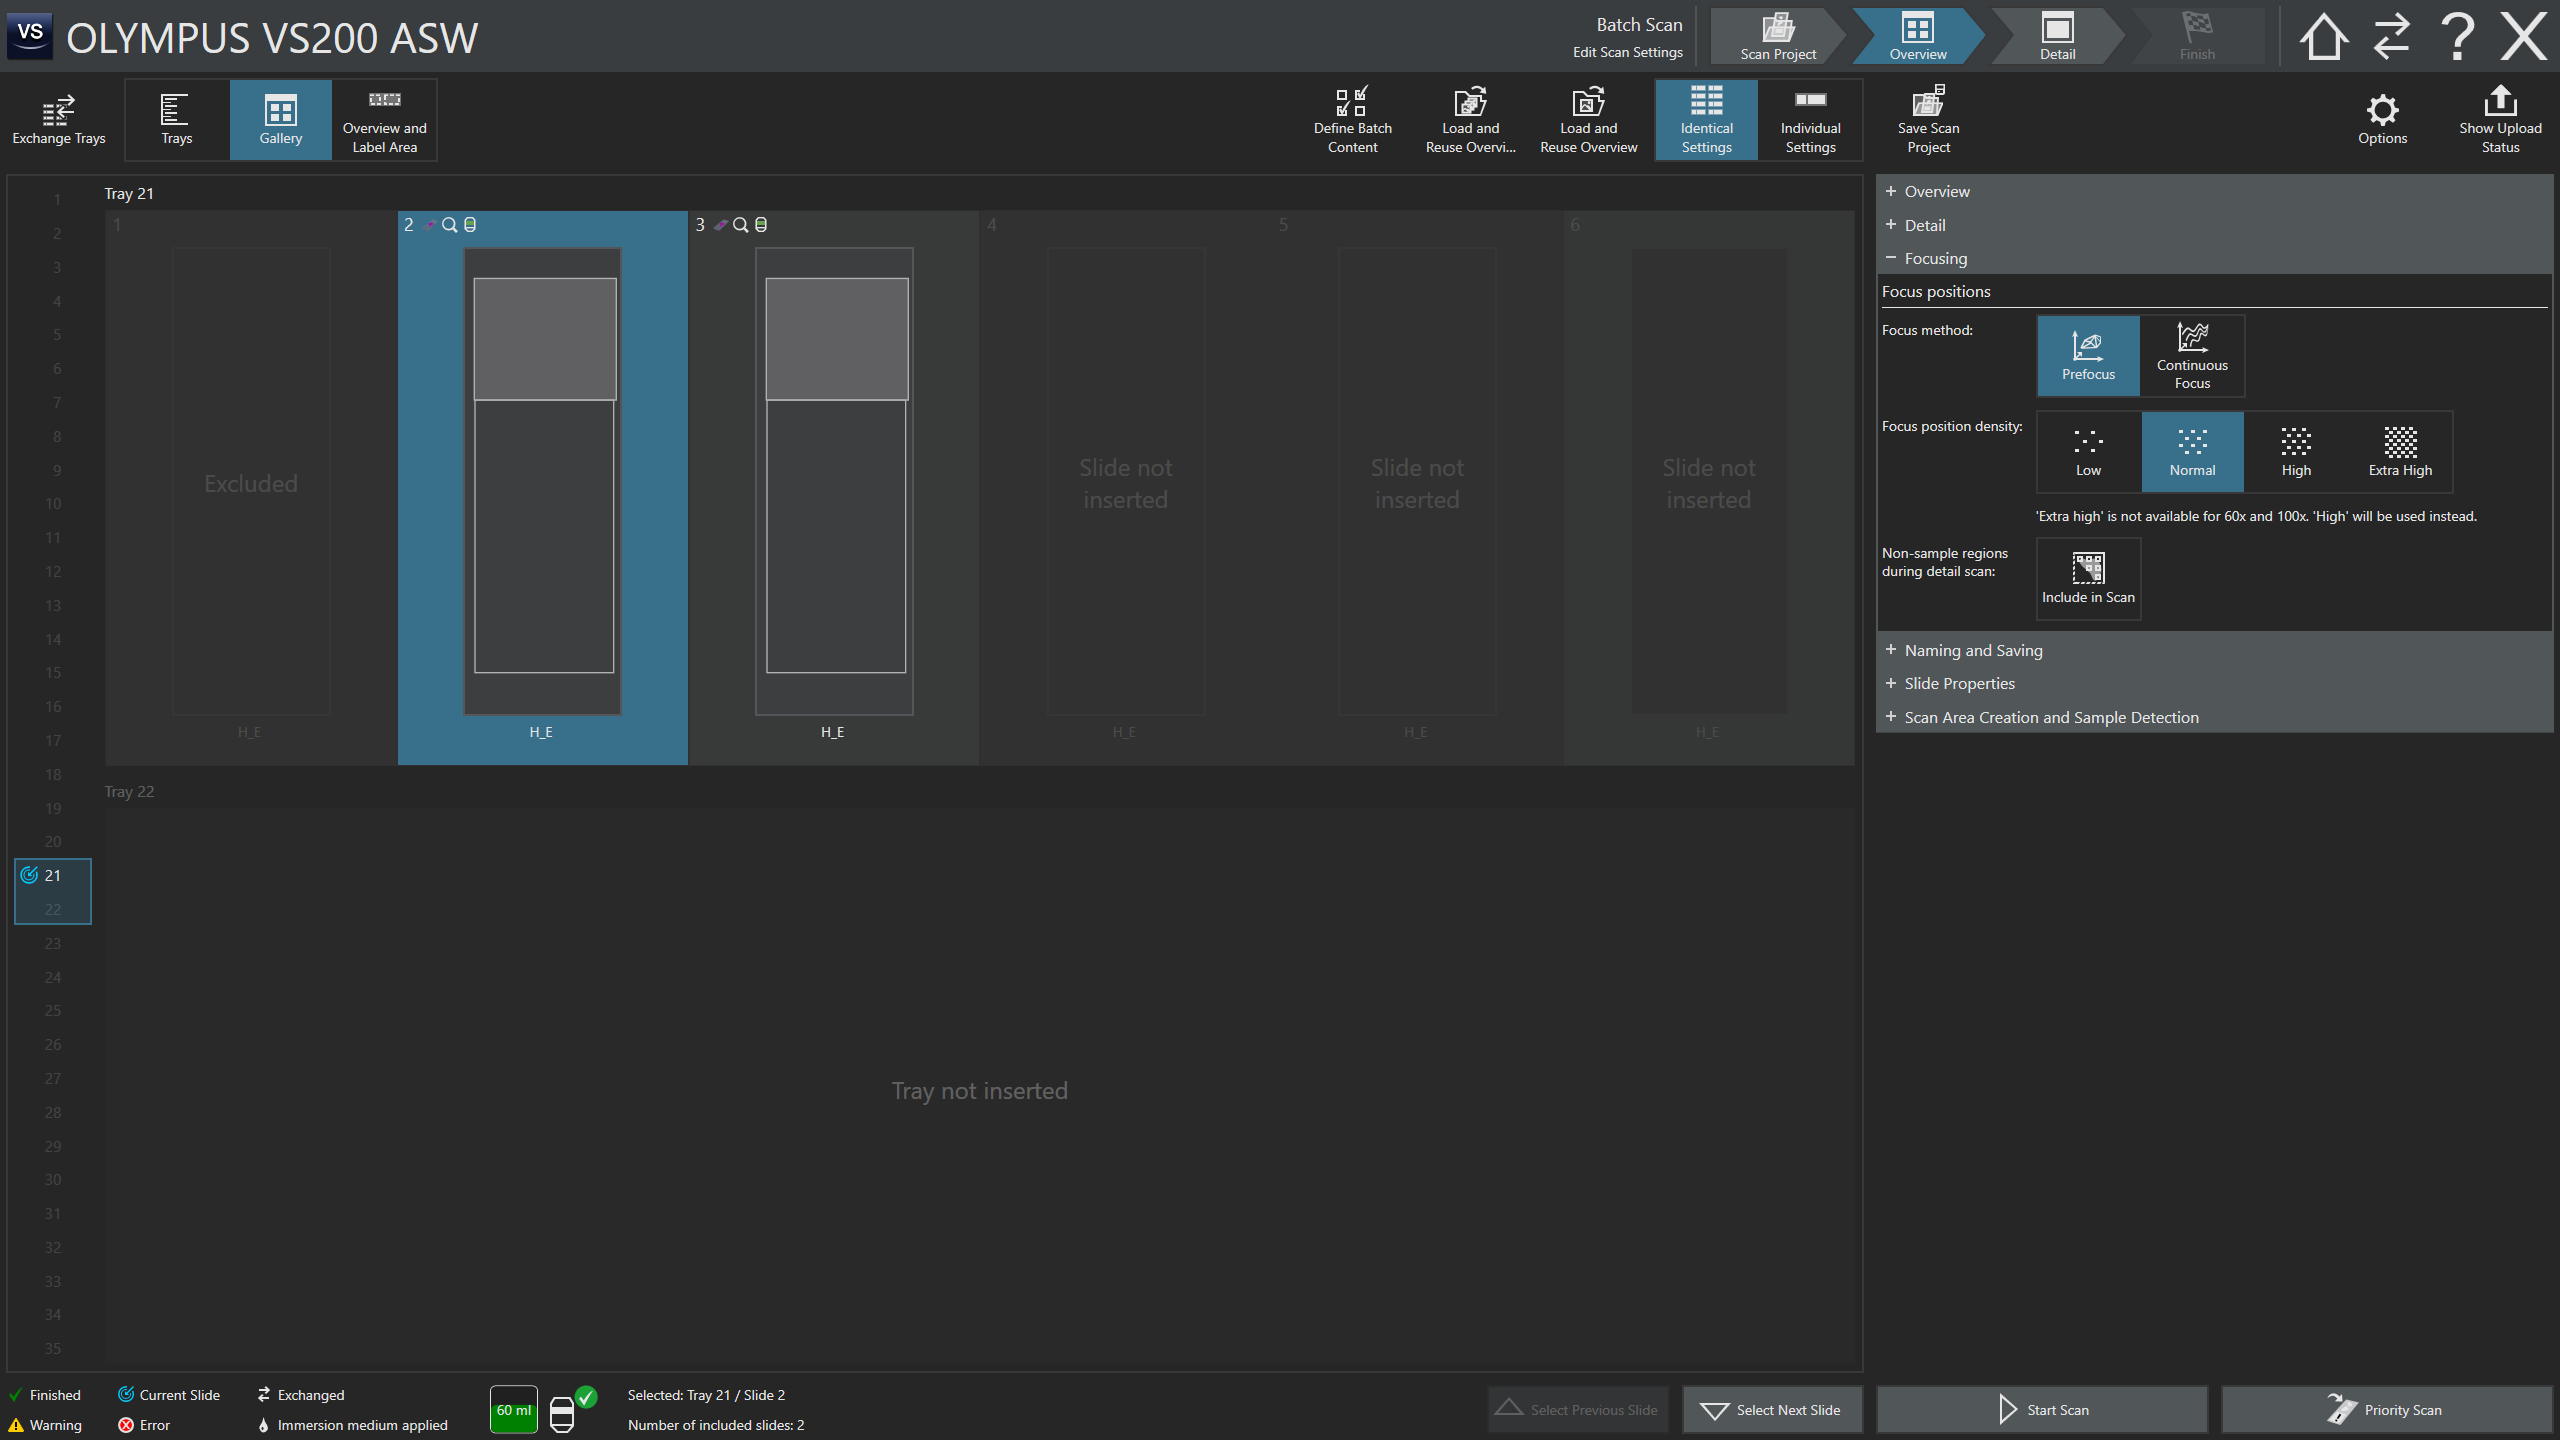 Focusing
Focus Method: - "Prefocus"
Focus position density: "Normal"
Non-sample regions during detail scan: "Include in Scan" off | on | Include in Focusing
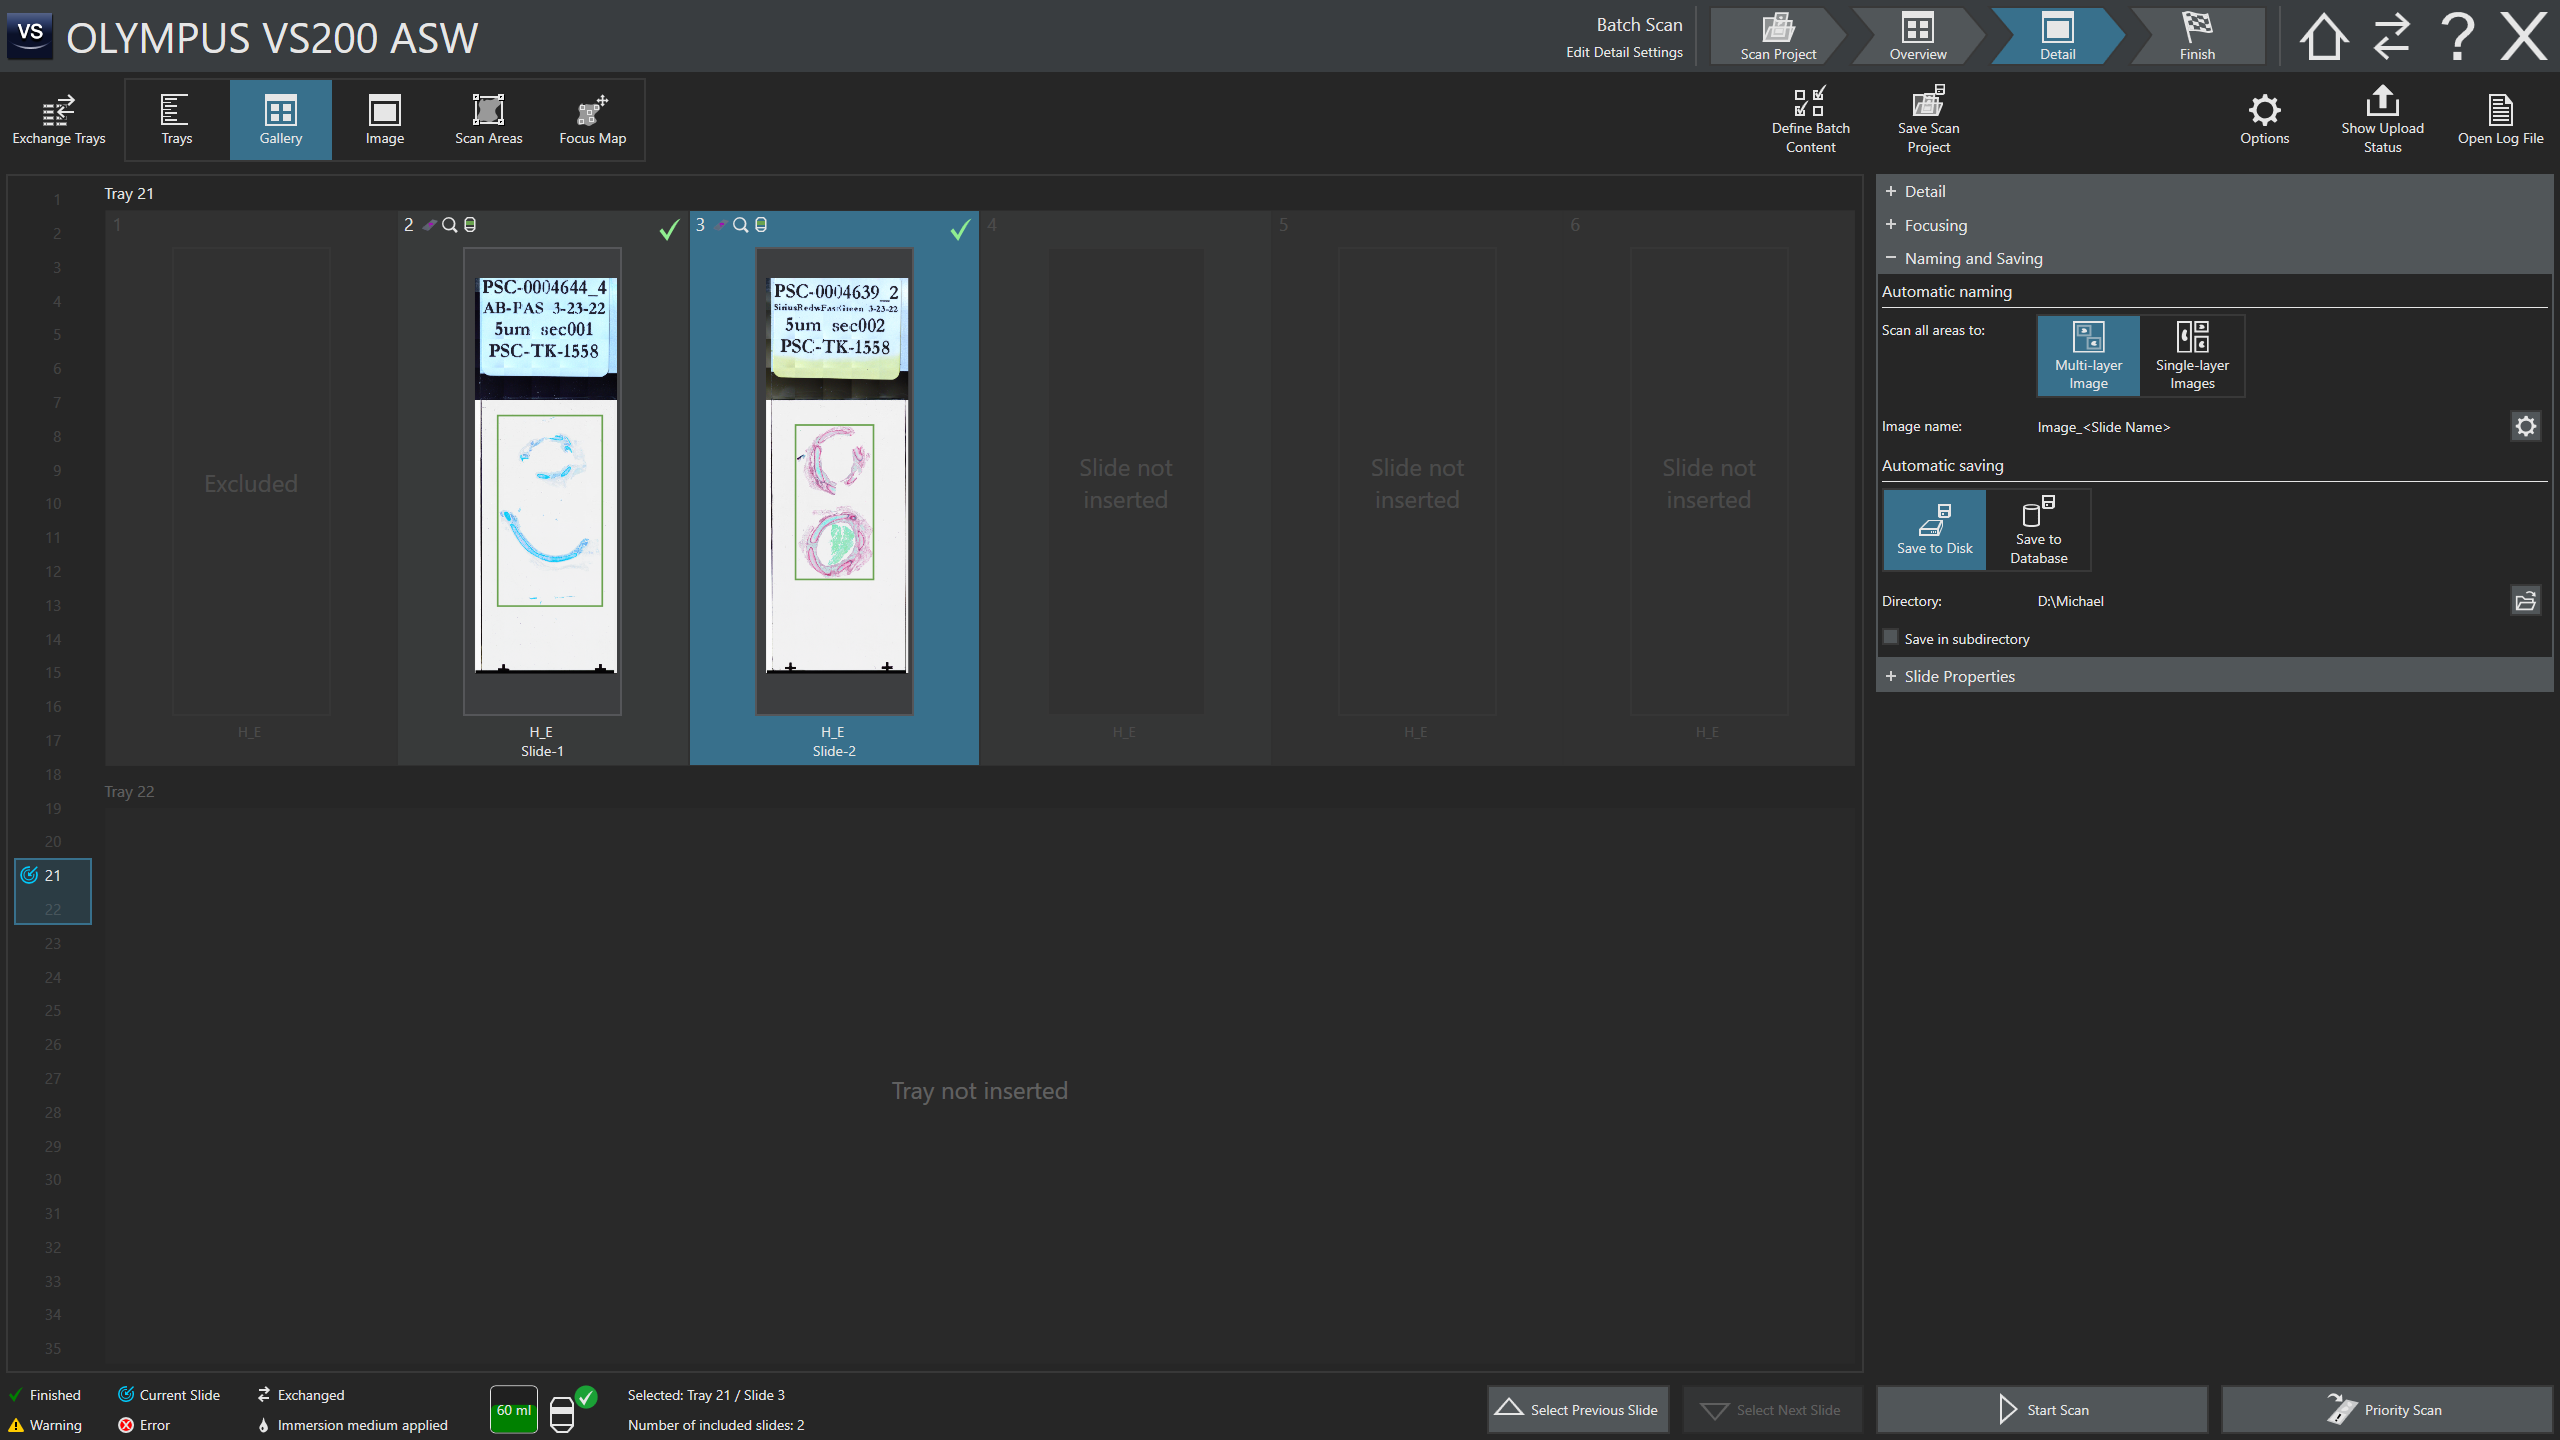
-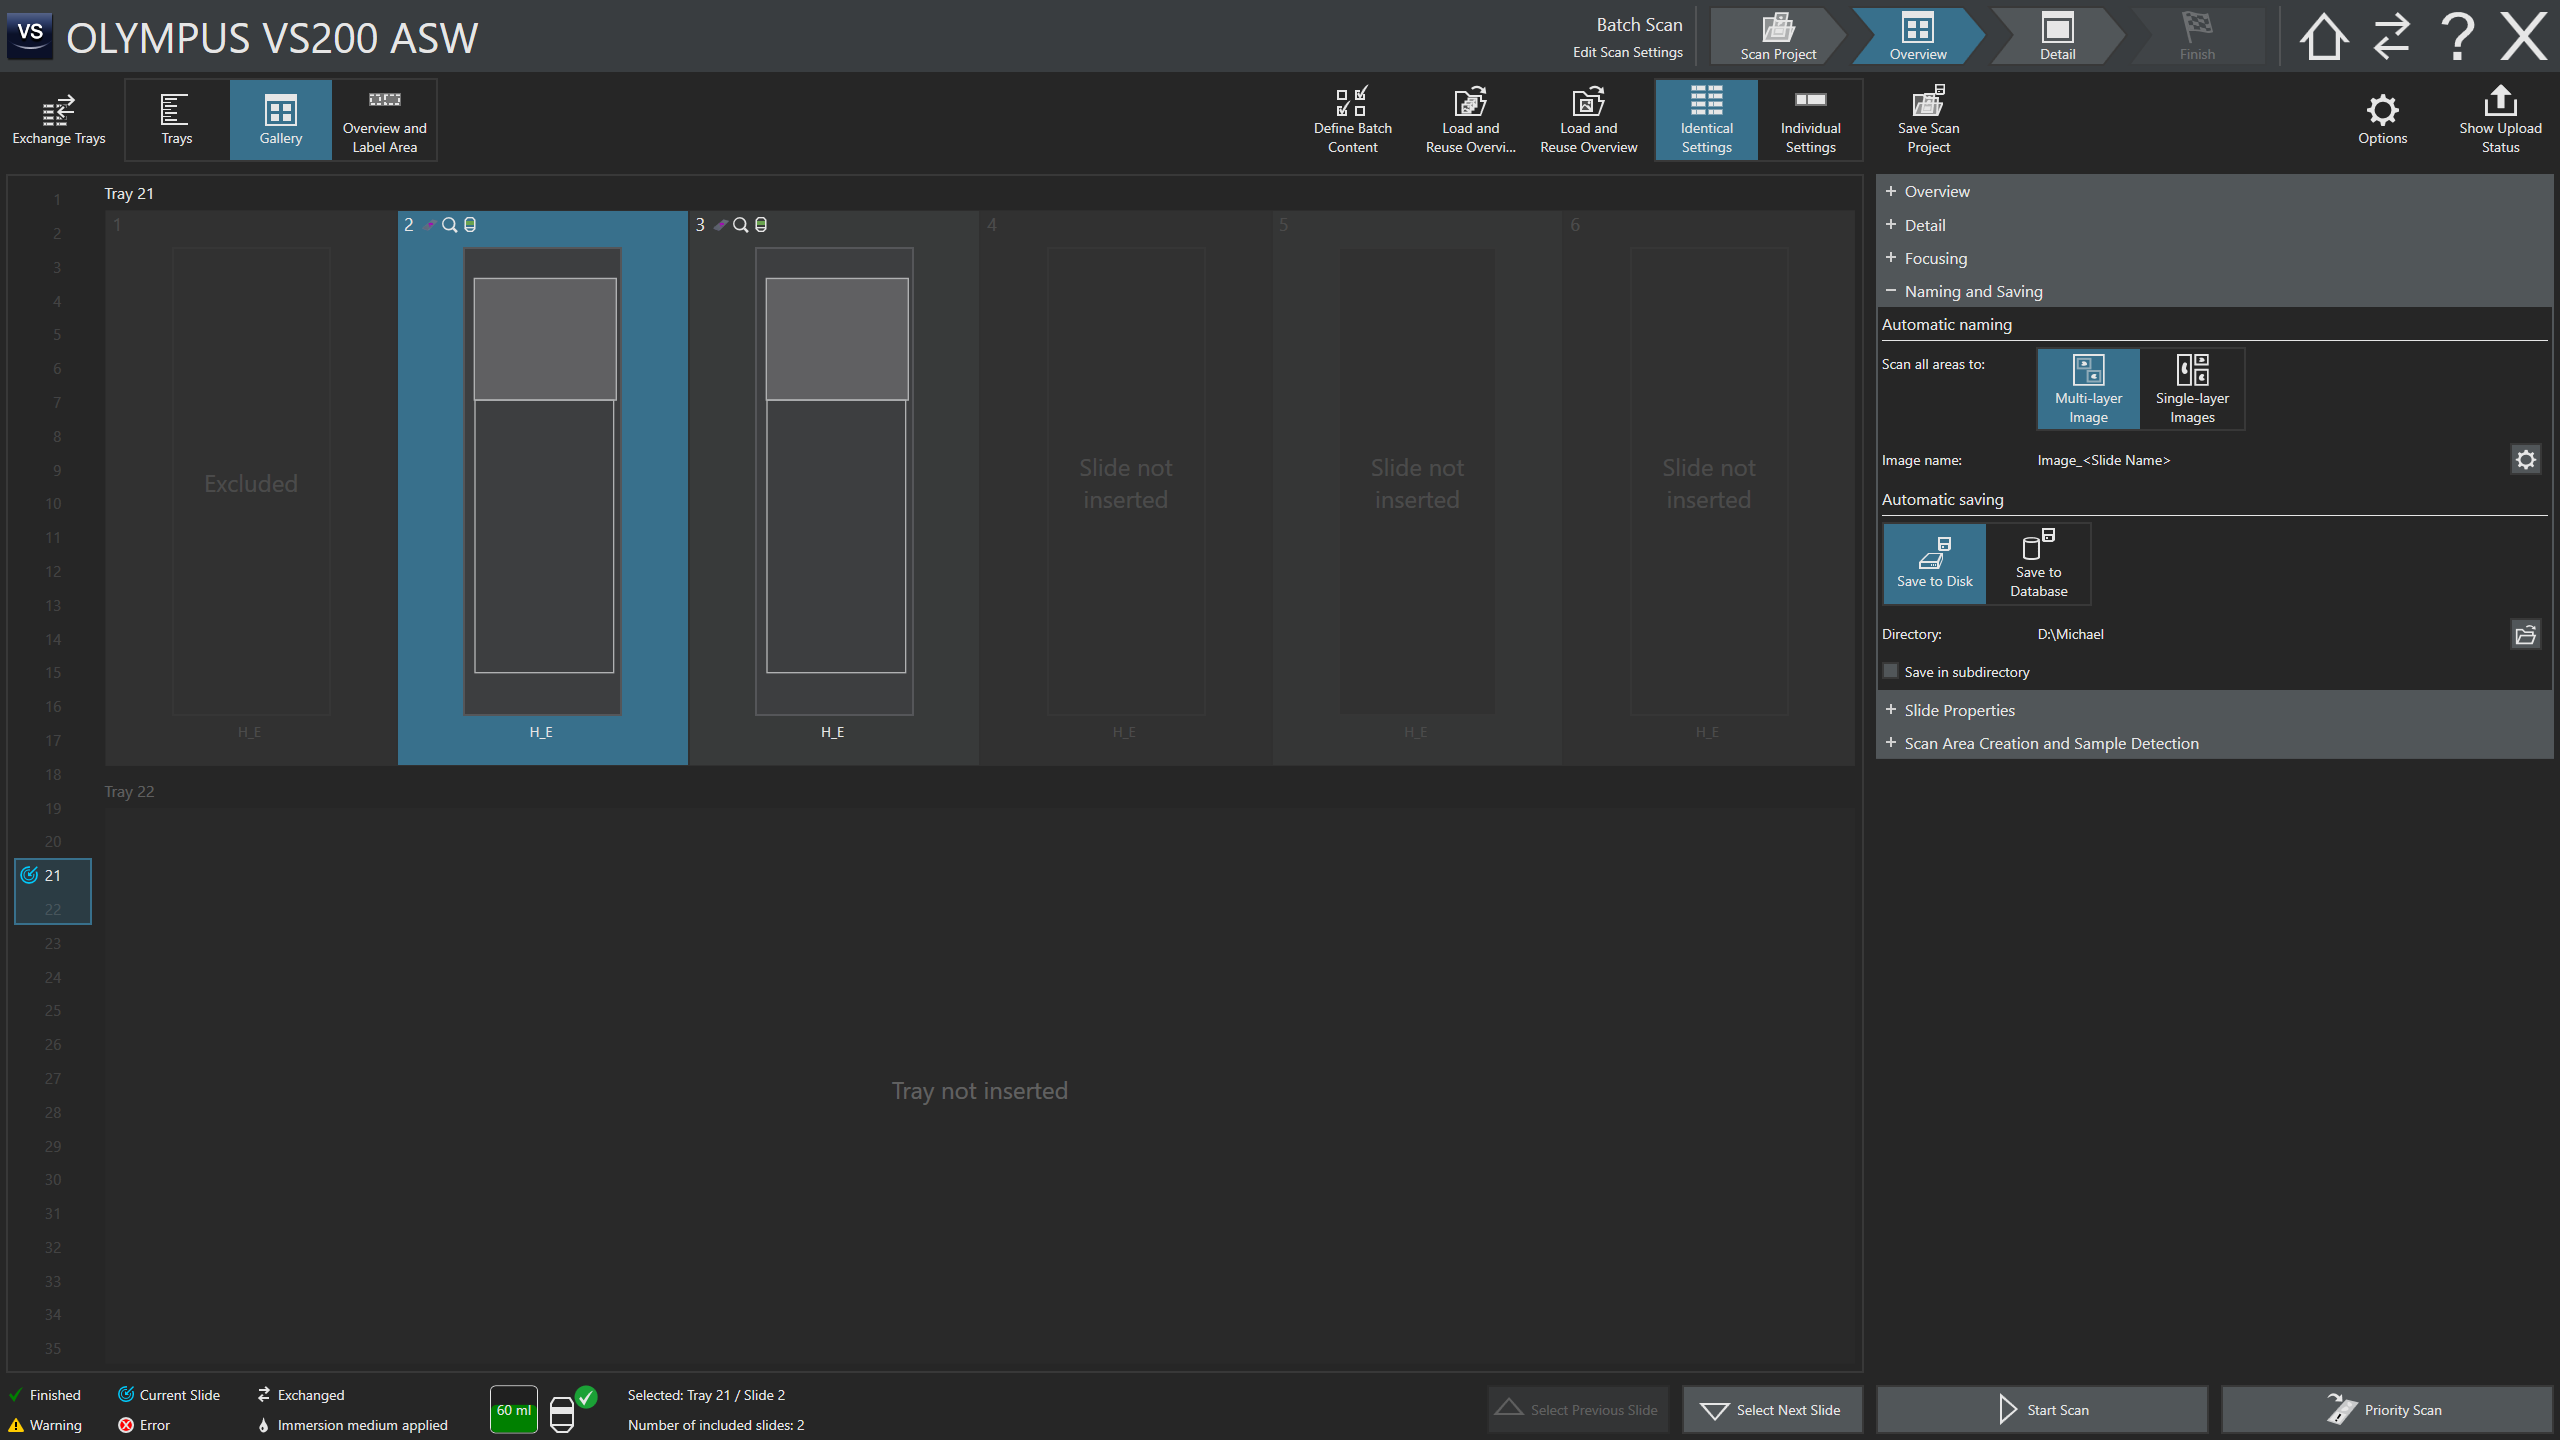 Naming and Saving
Mostly leave as is
Directory: - set as required. Suggest use D: drive directory
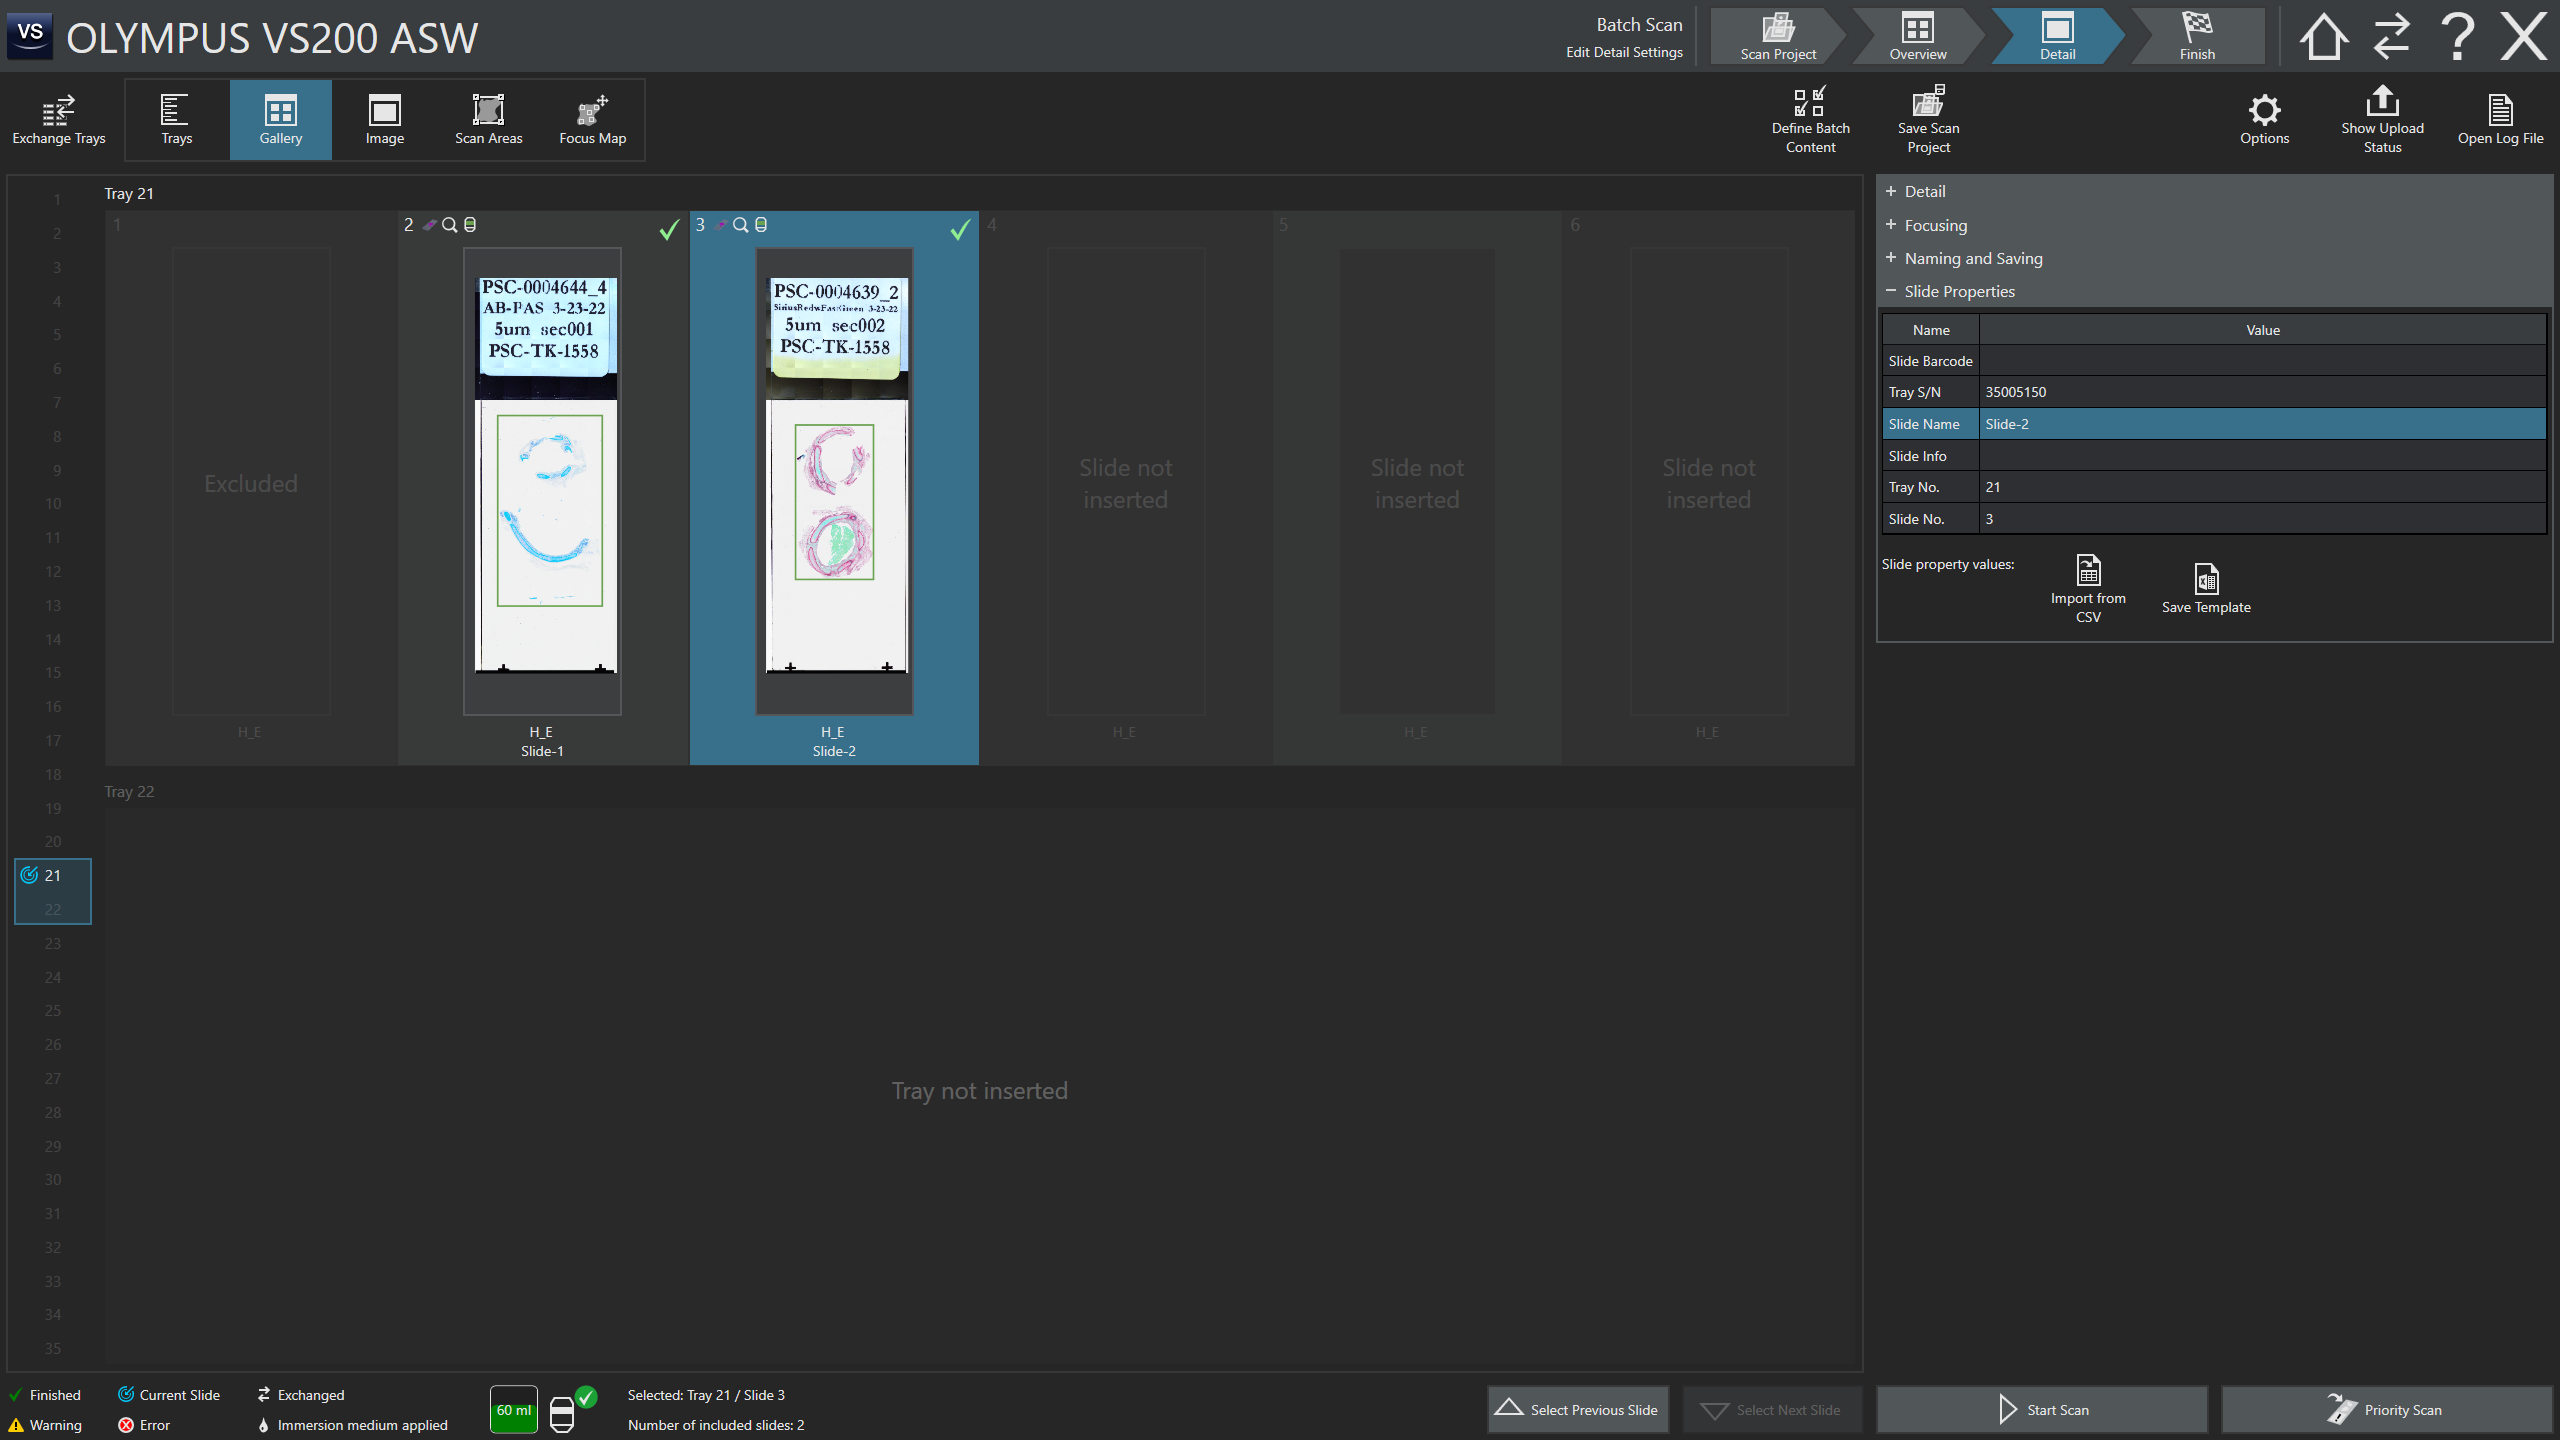
-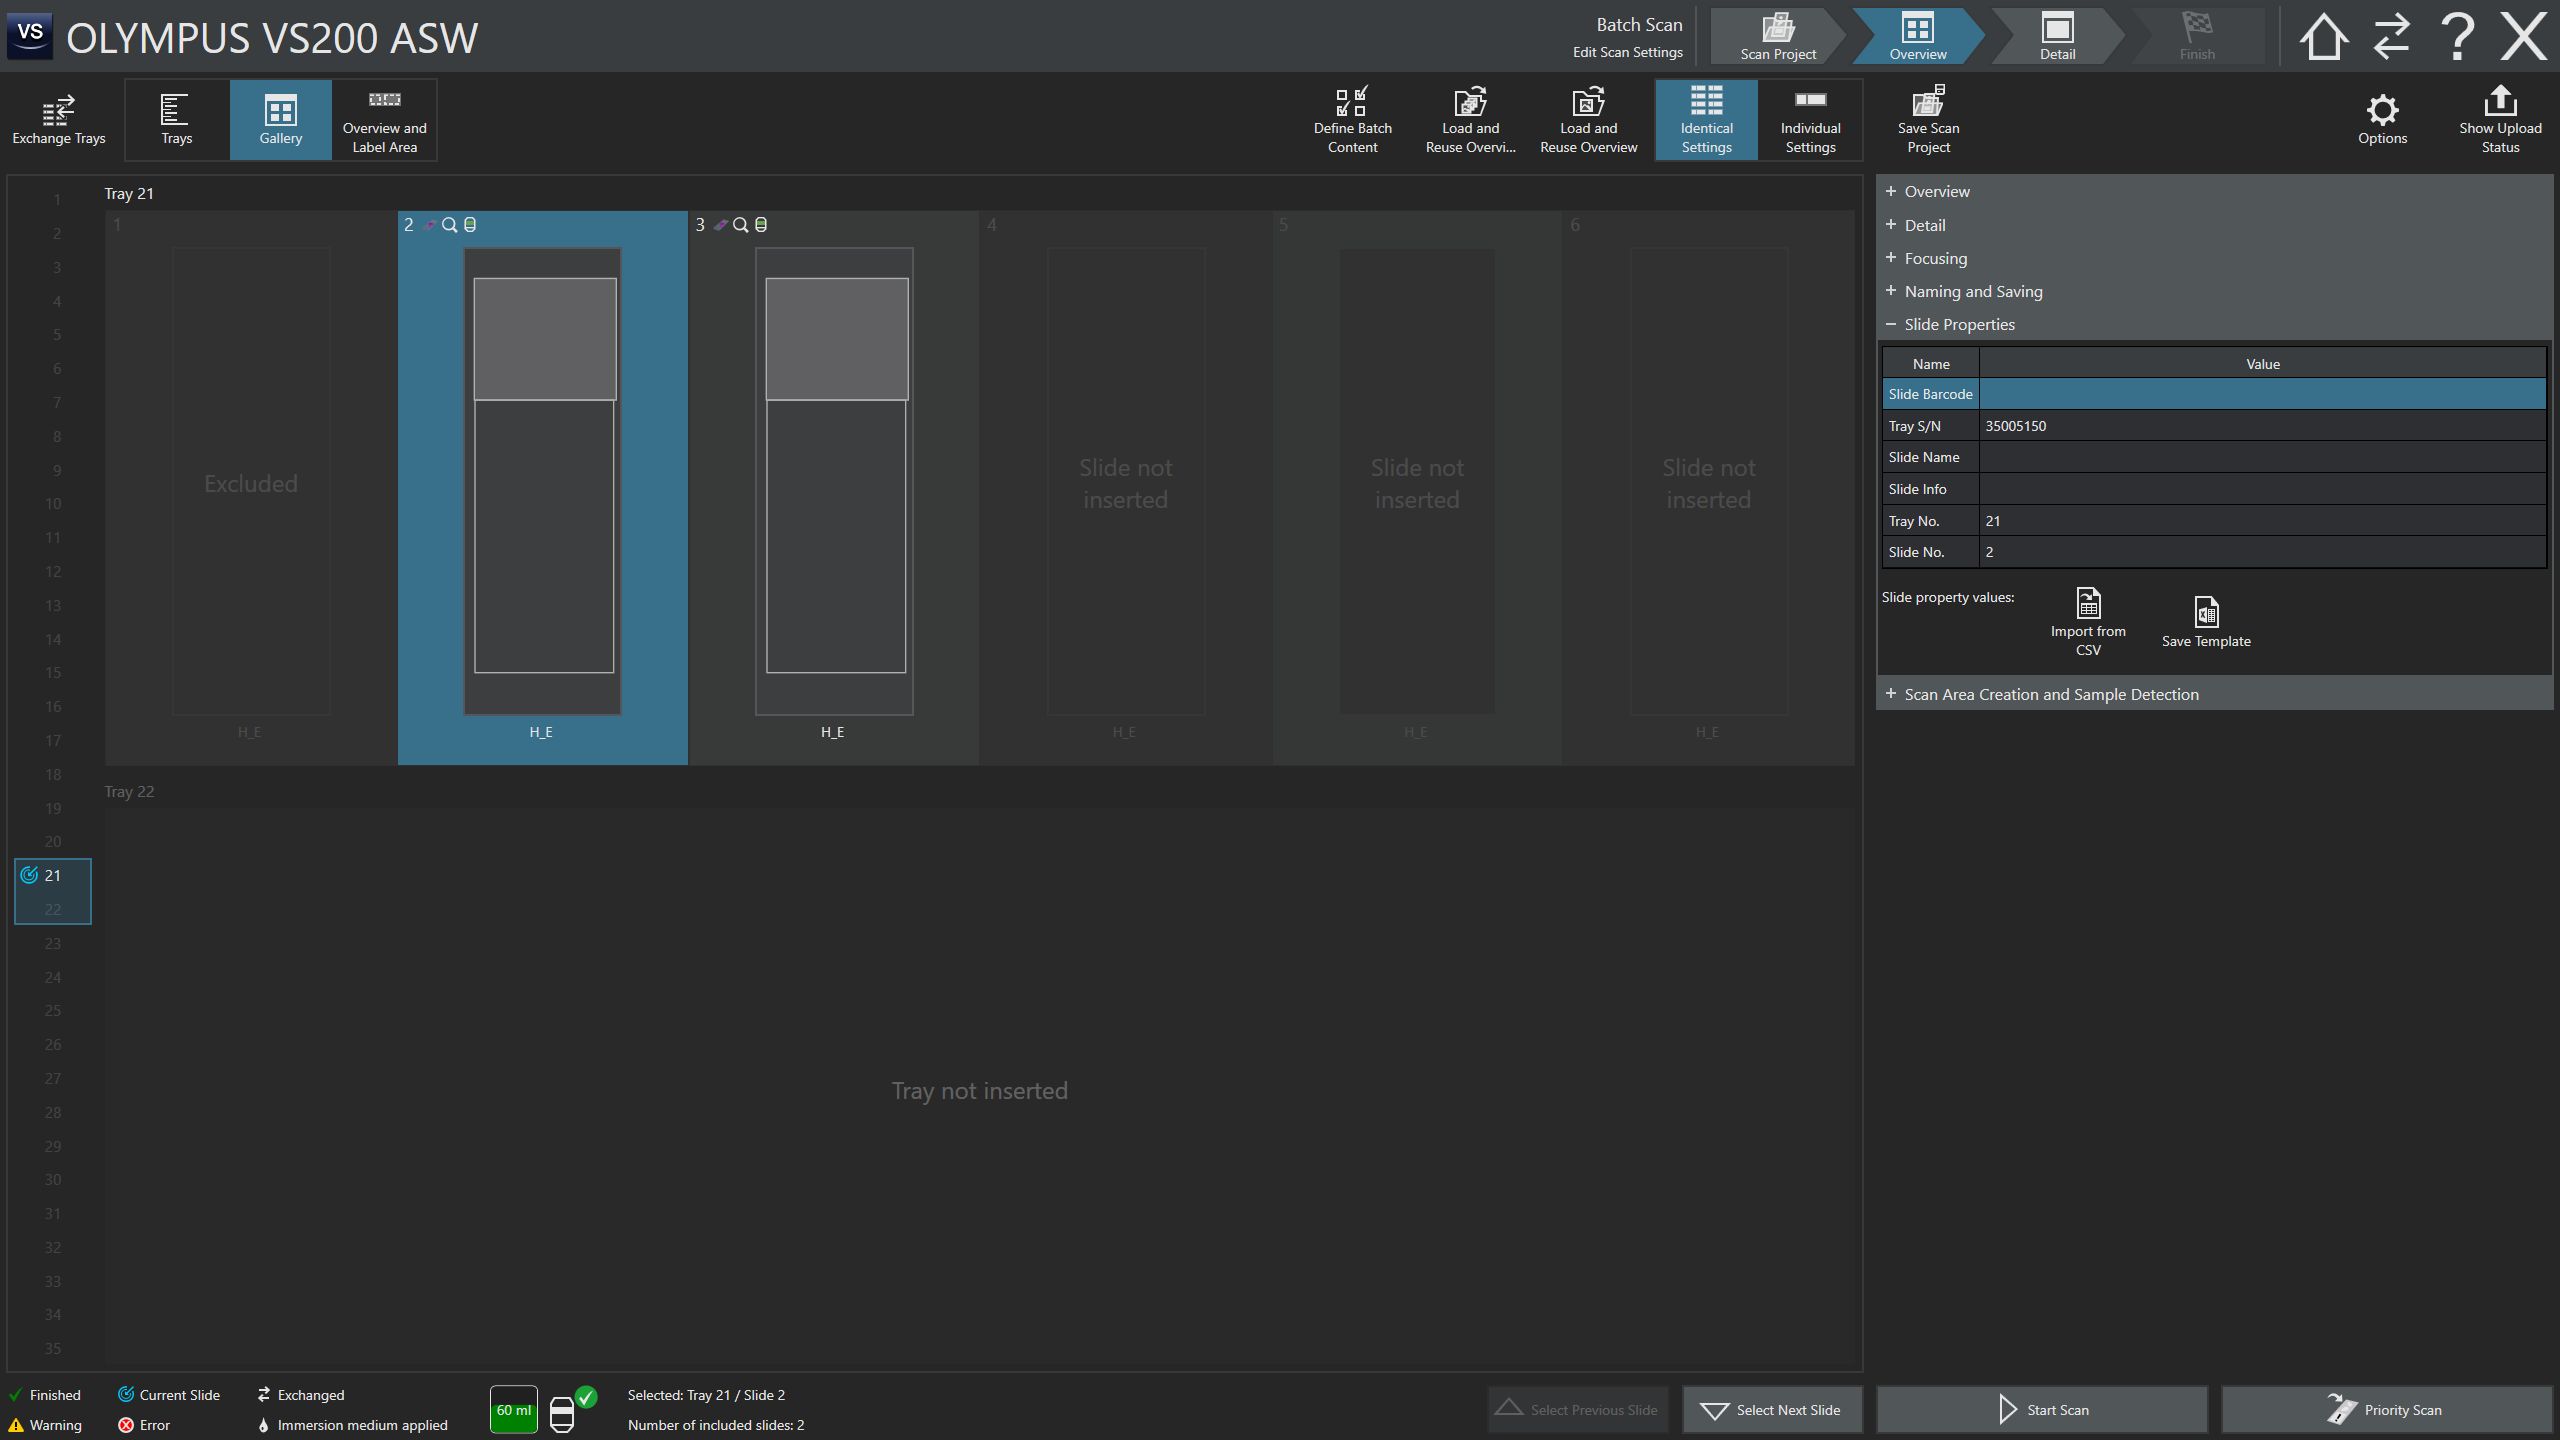 Slide properties
Set "Slide Name" to a value. Note can change in "Detail" mode after scanning slide labels using label information
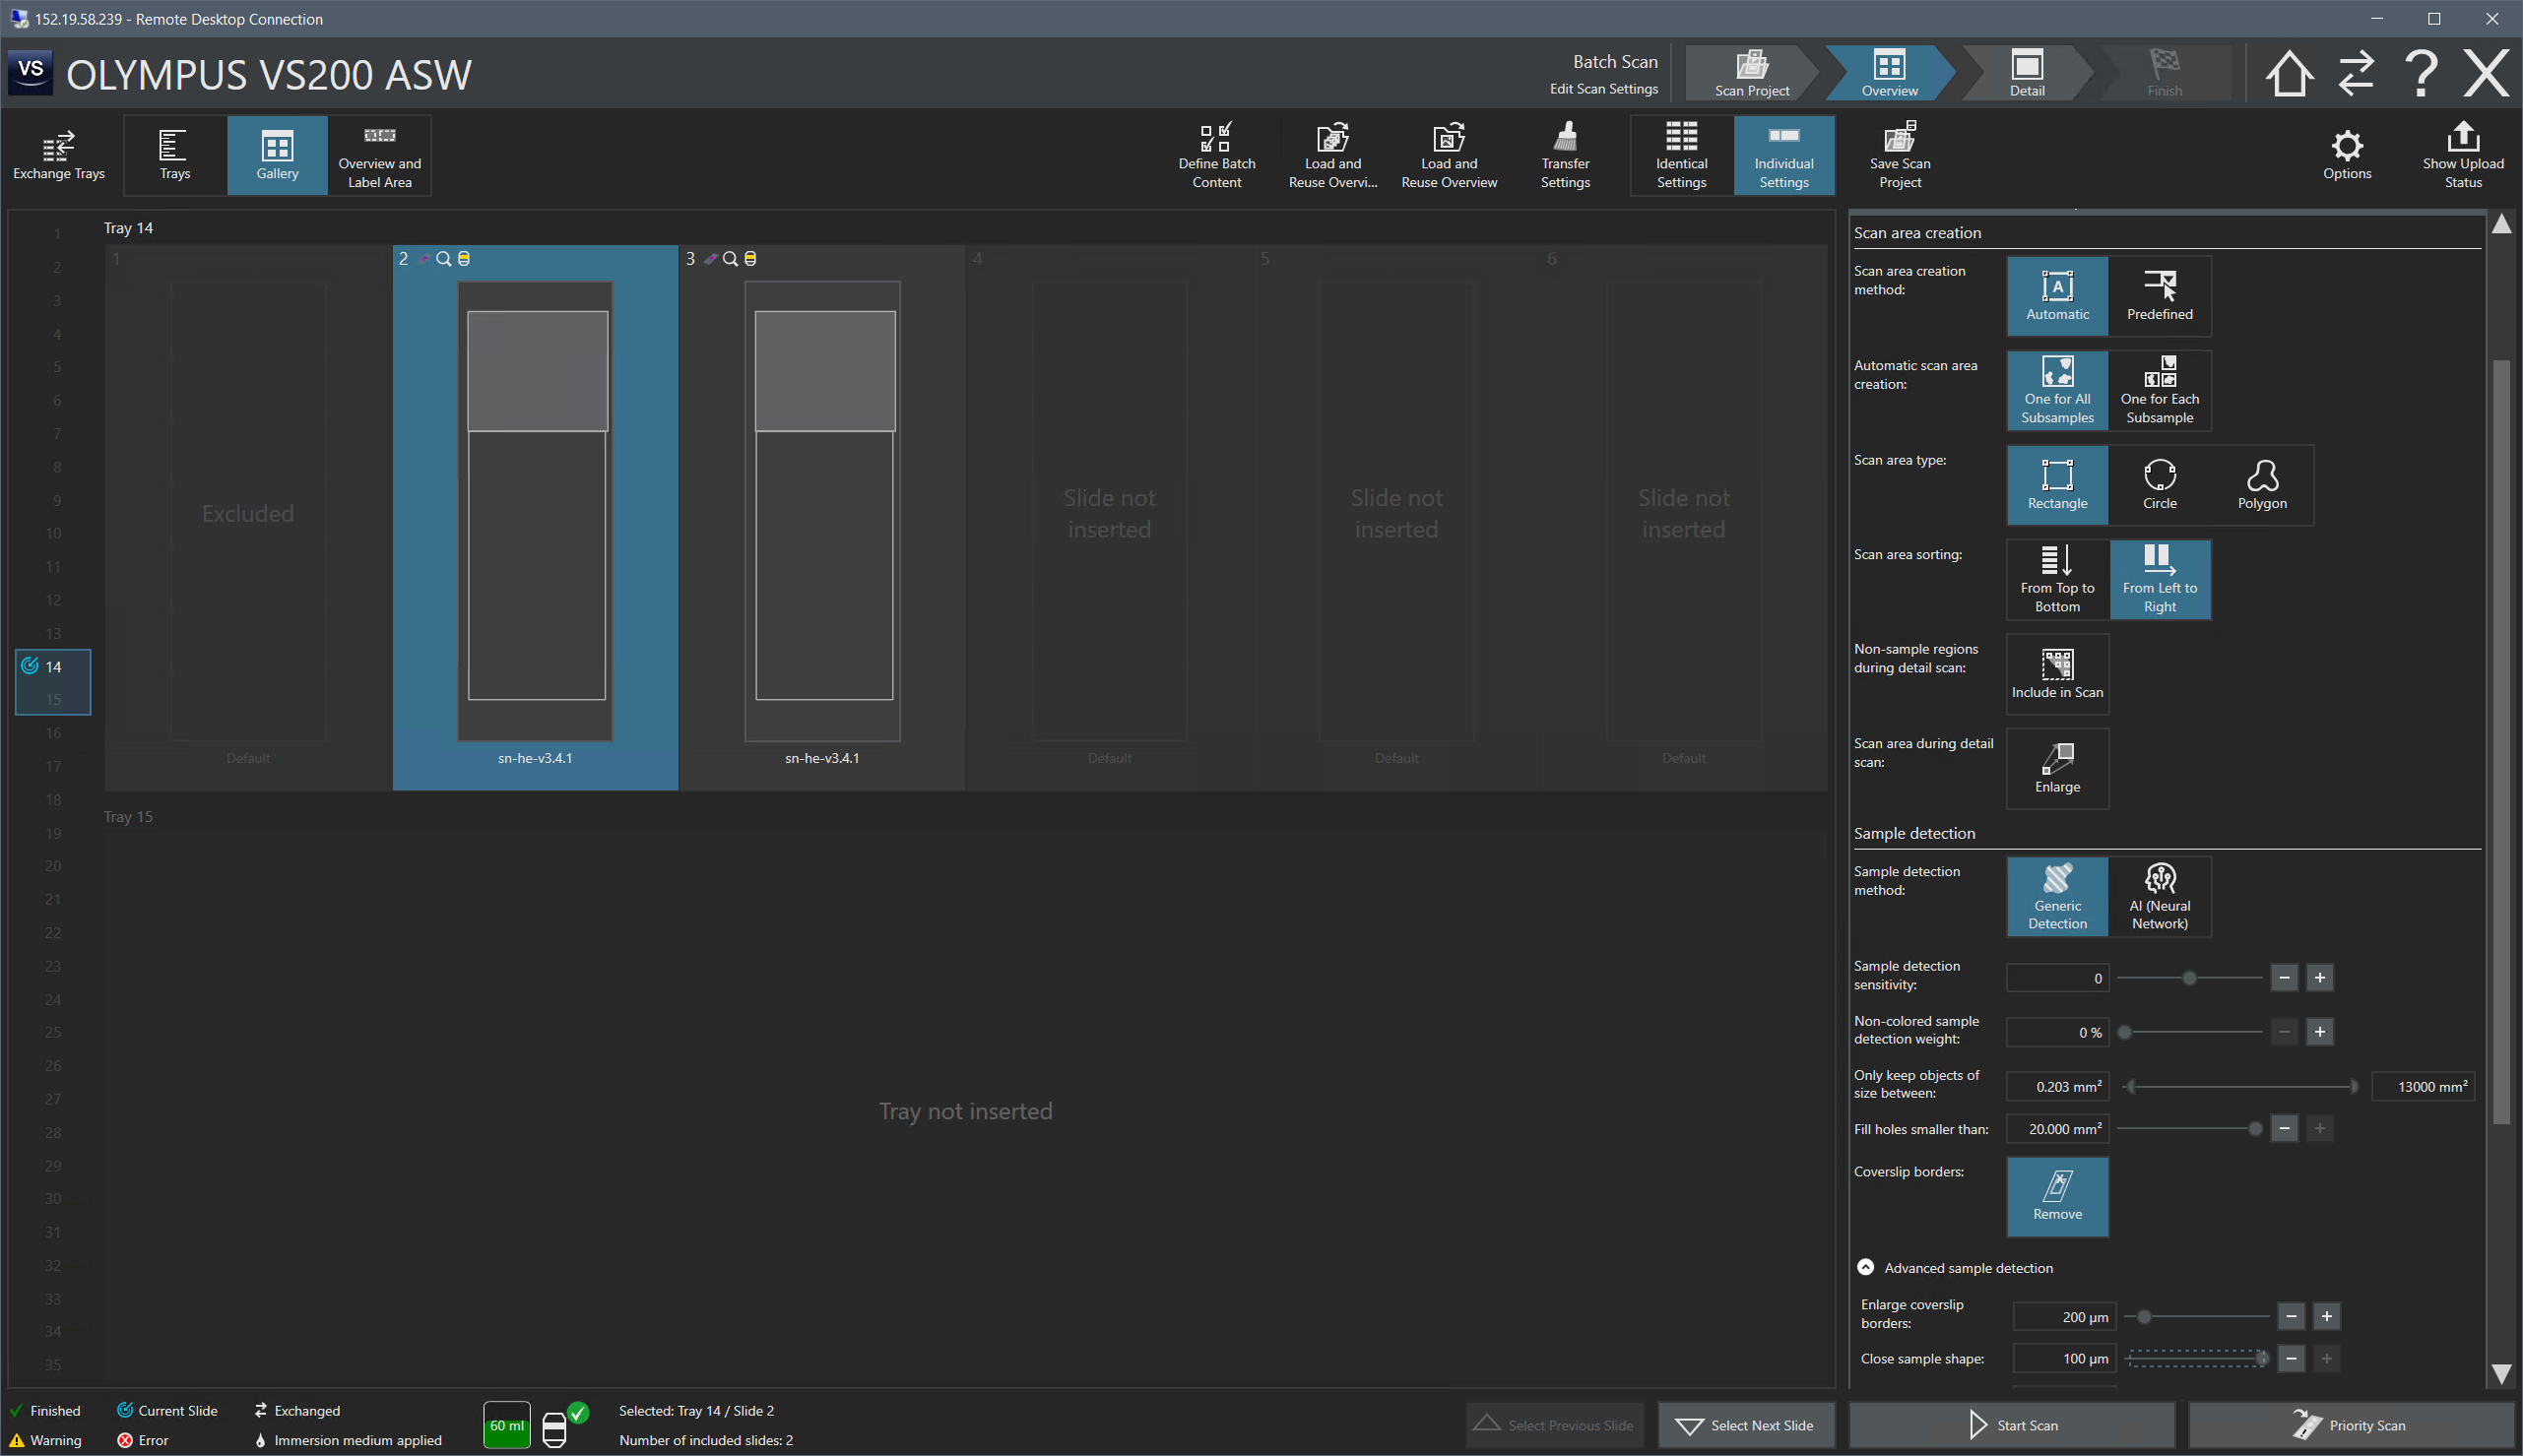
-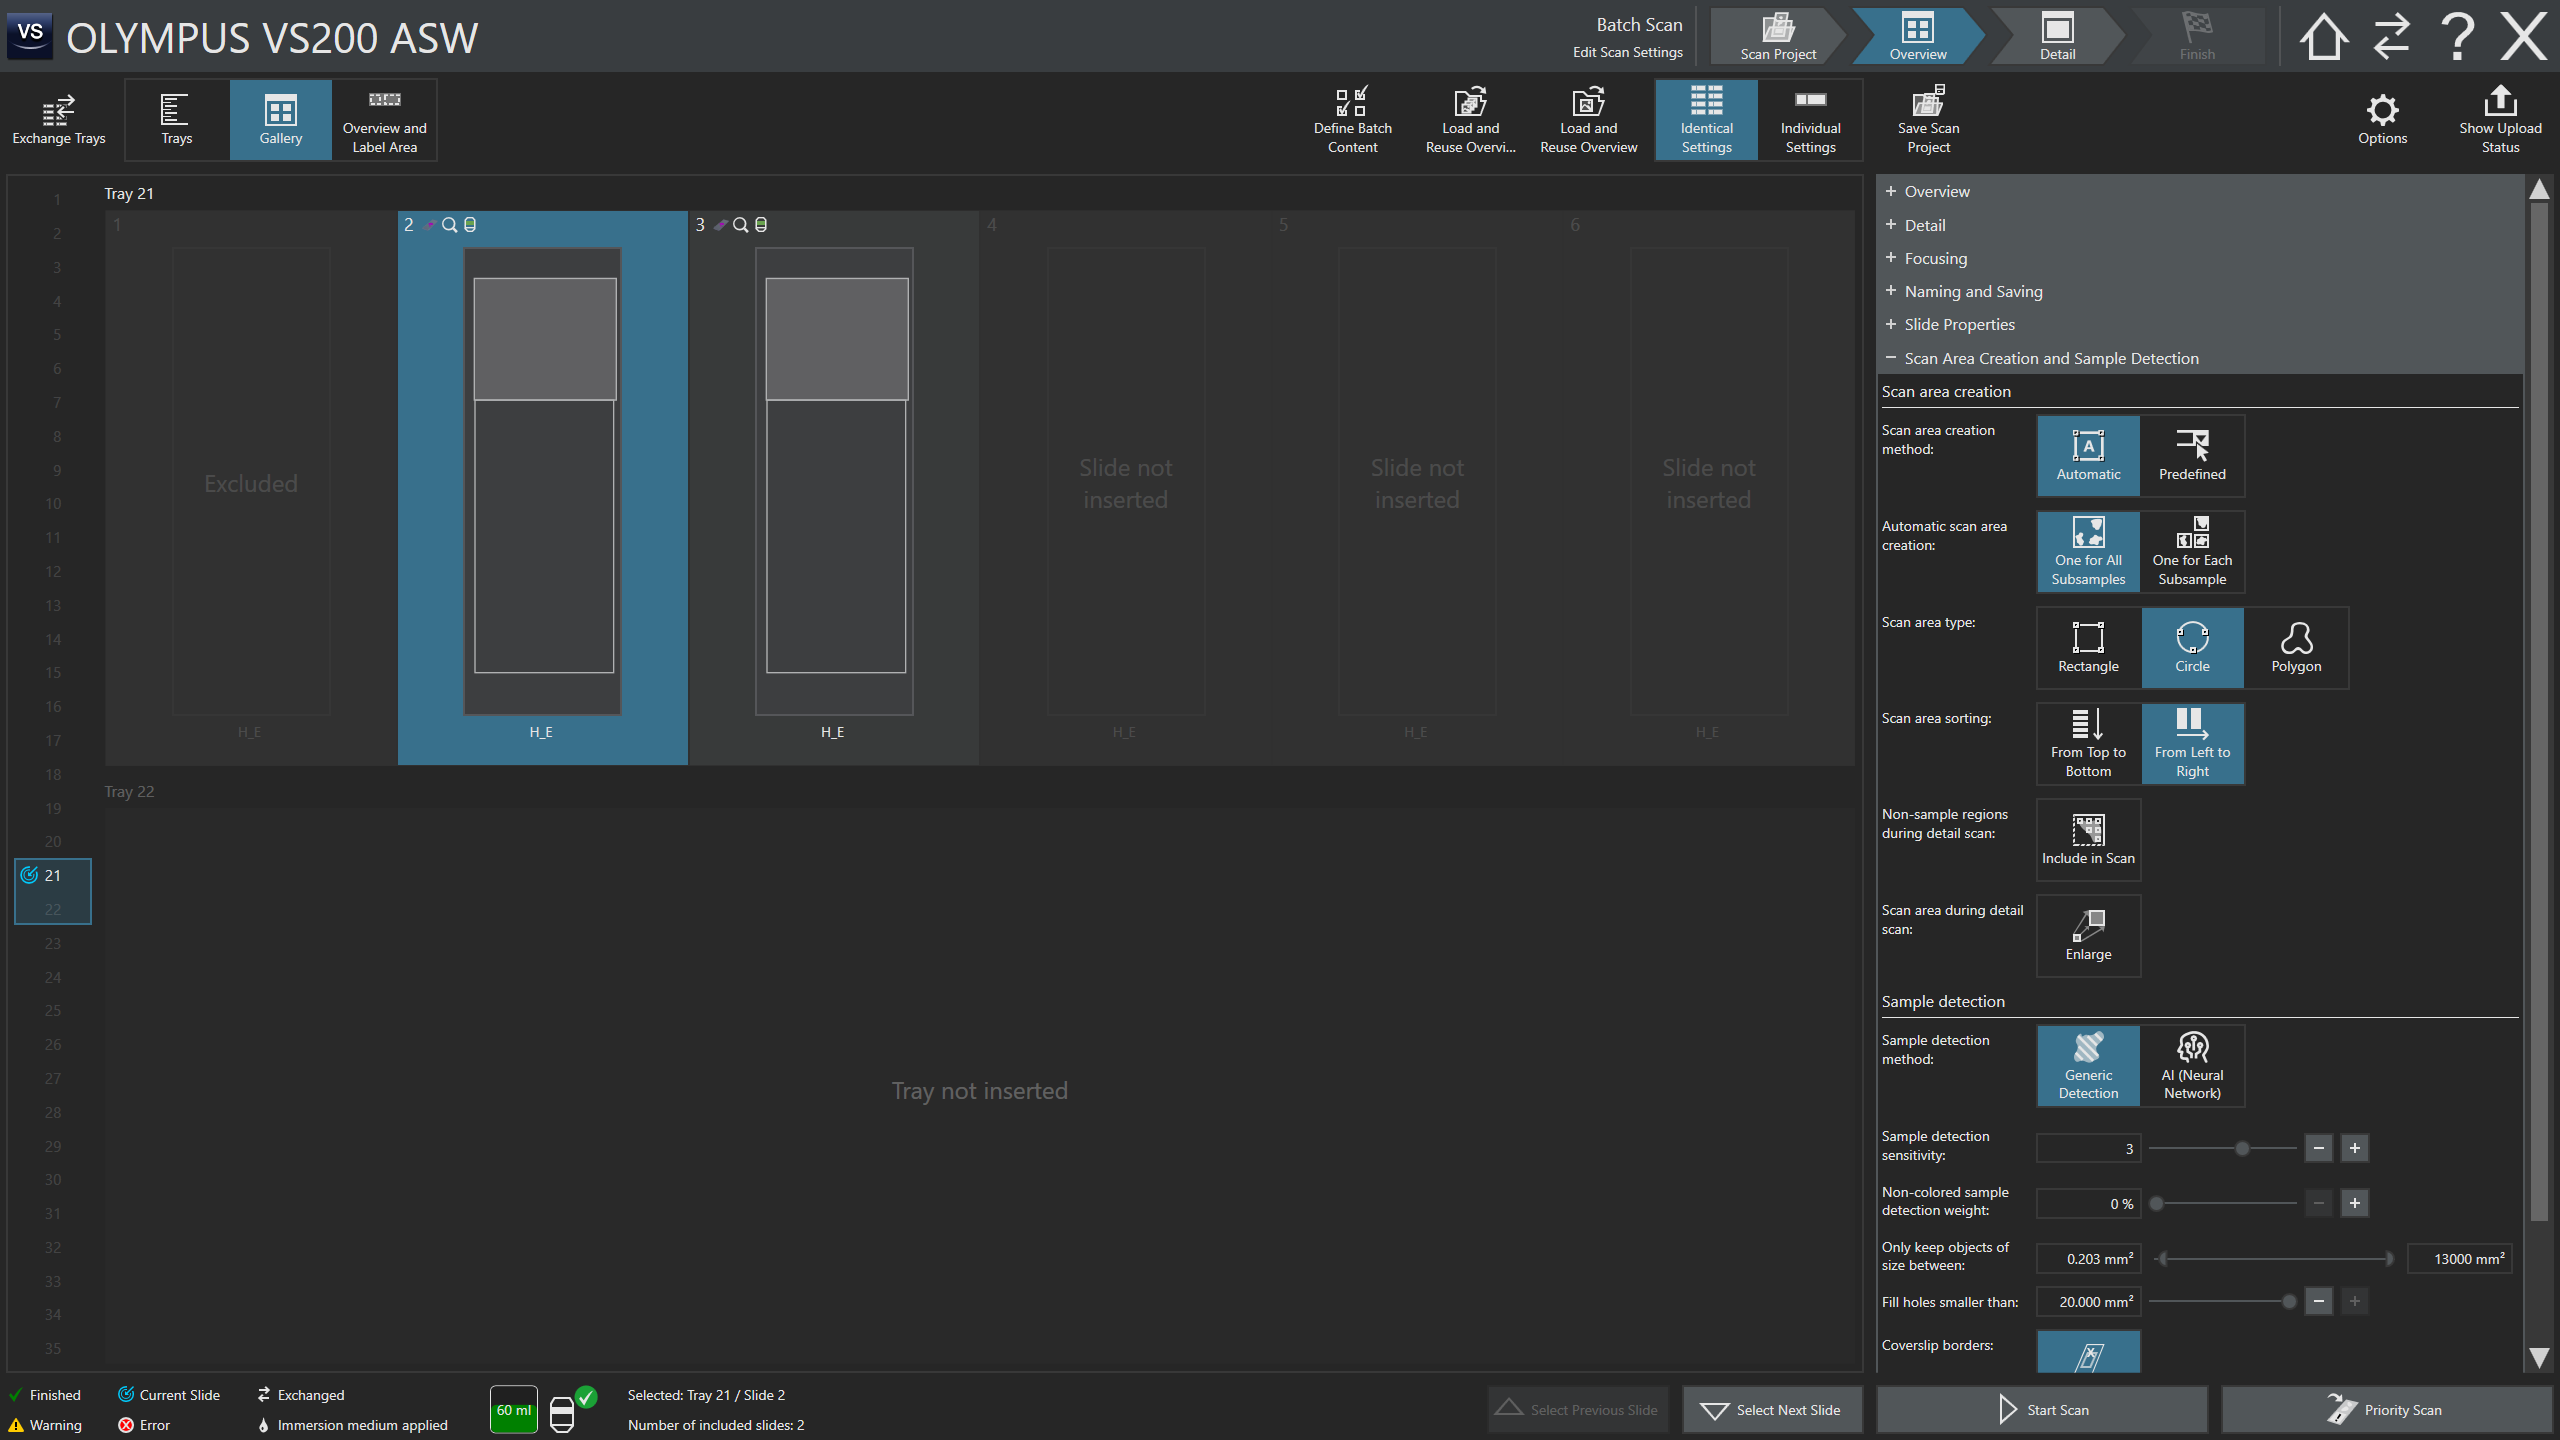 Scan Area Creation and Sample Detection
(Can setup defaults now. But can mostly adjust in "Details" mode later)
Scan Area Creation and Sample Detection
(Can setup defaults now. But can mostly adjust in "Details" mode later)
Scan Area creation
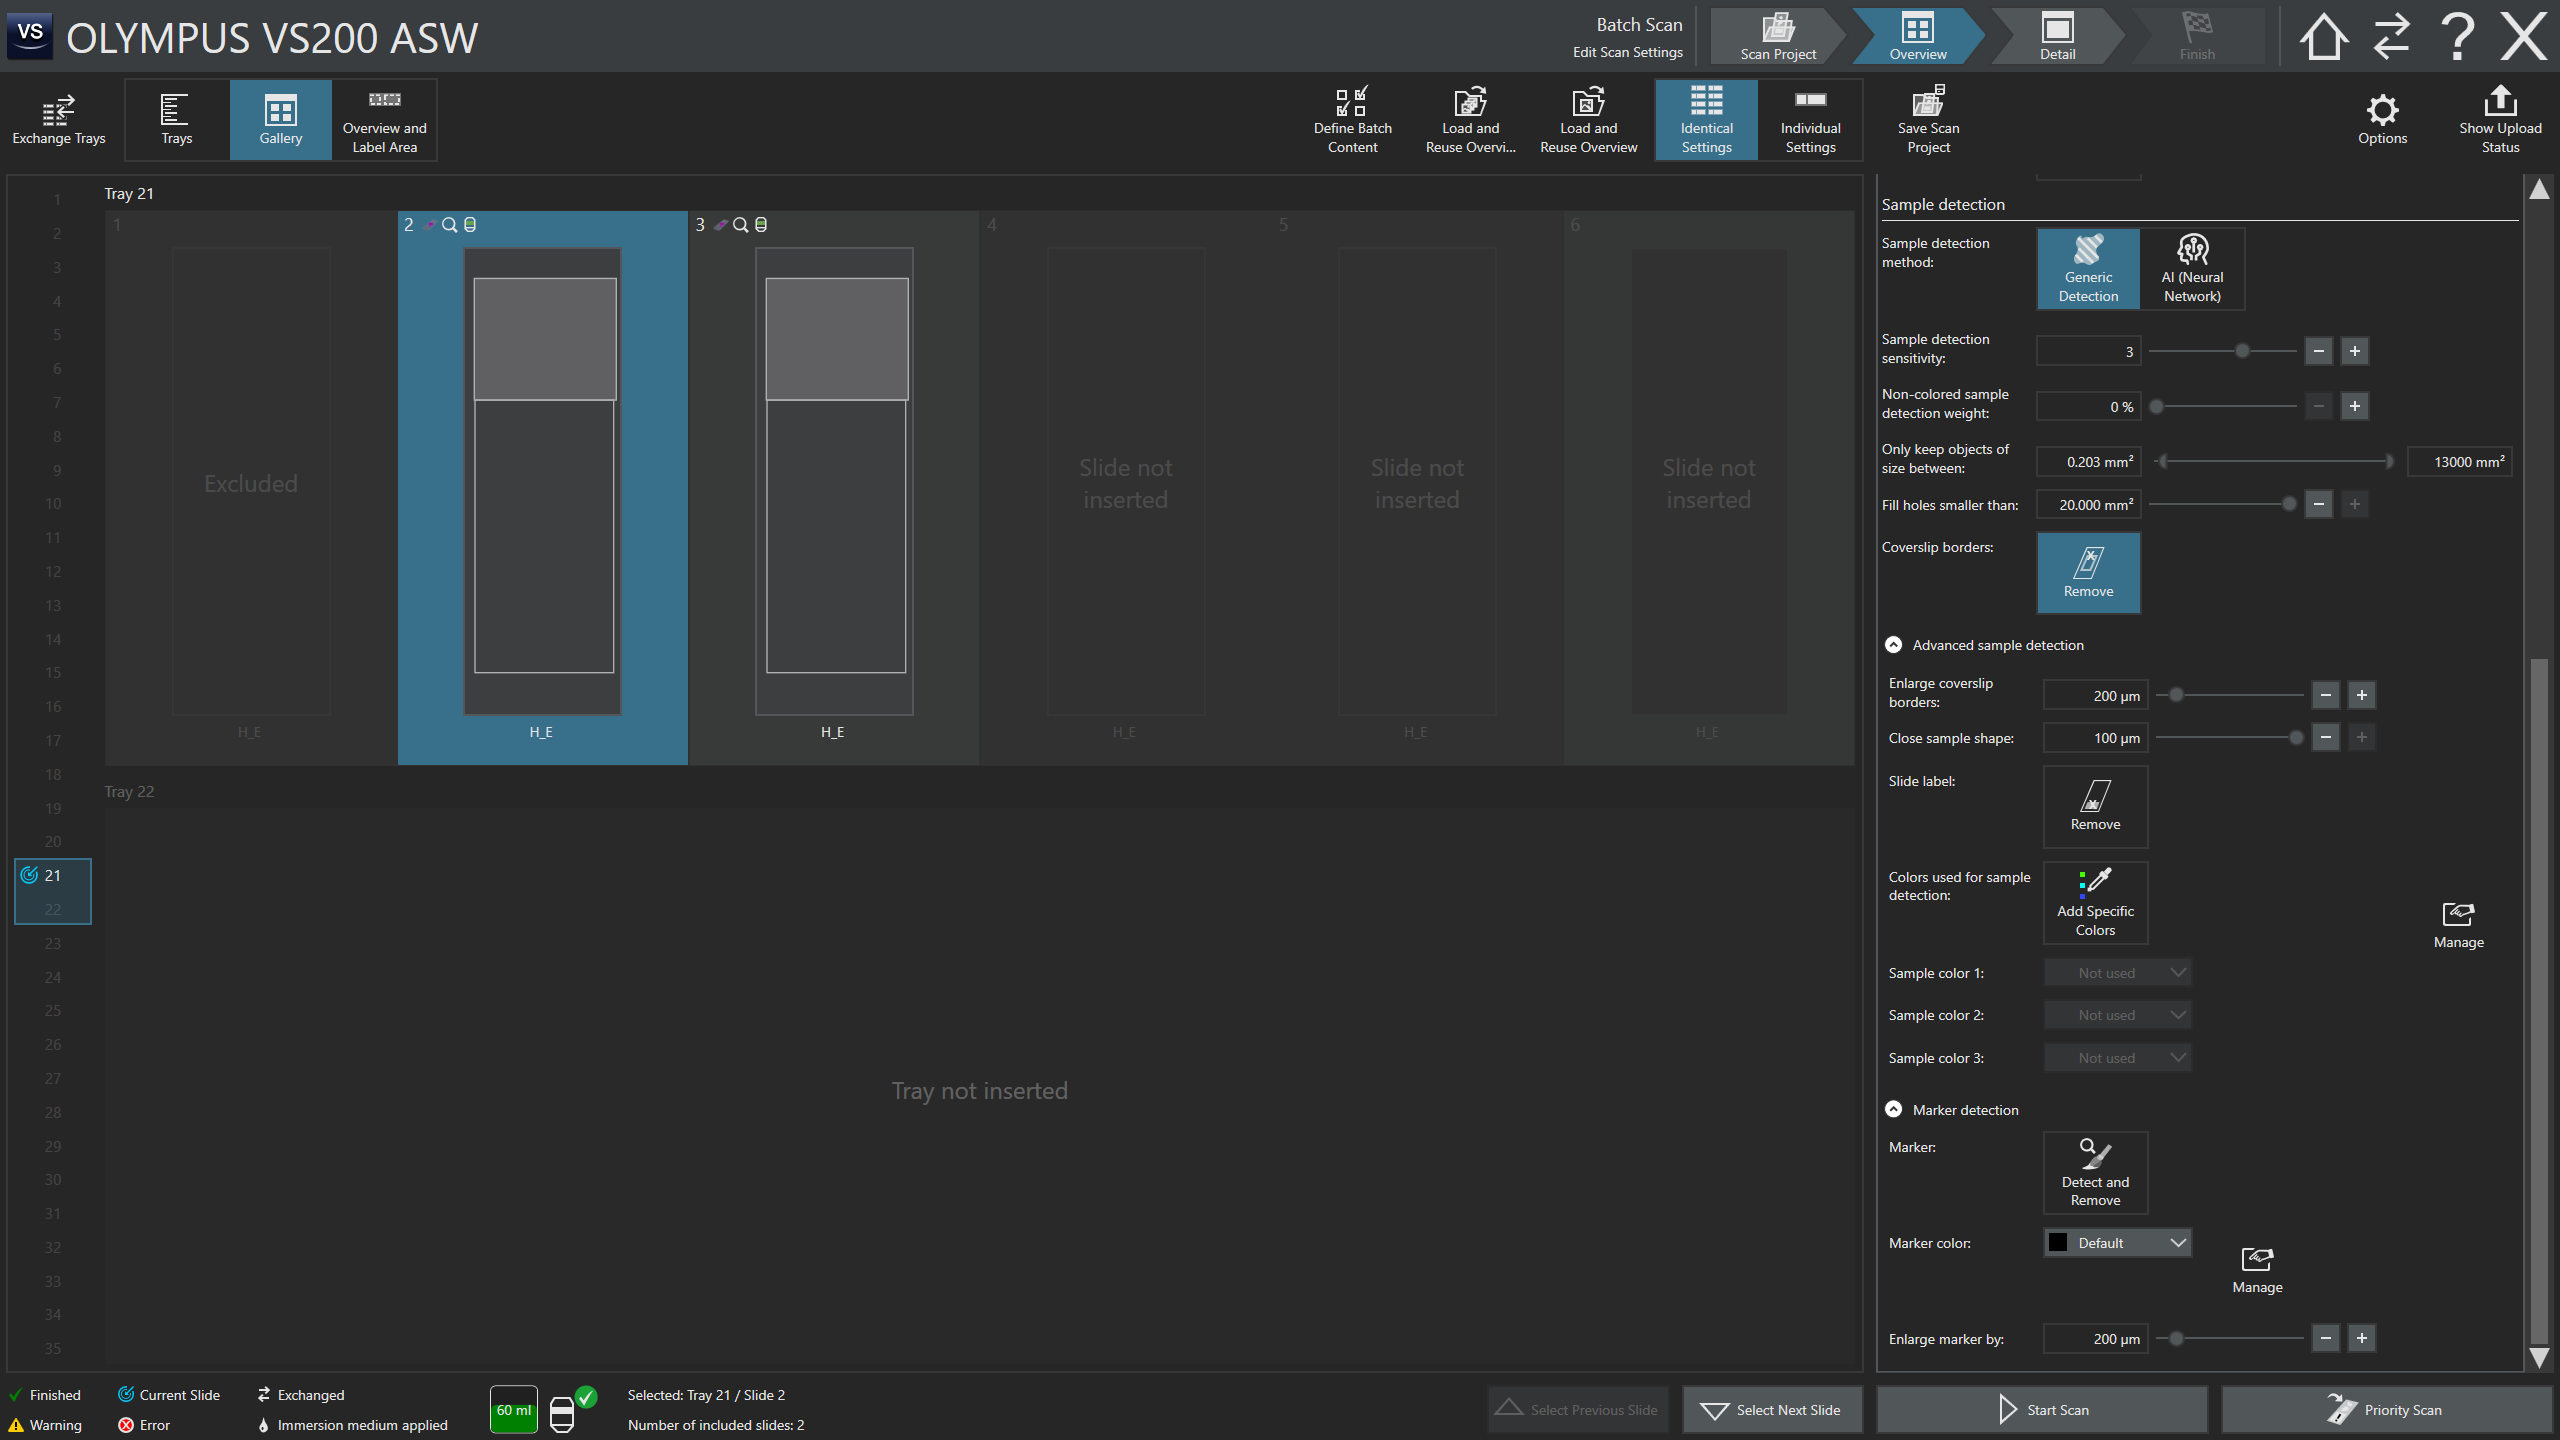
Sample Detection
If settings should be applied to all slides (e.g. if change any of above from what is setup in chosen Project)
Select and highlight slide which has been setup (probably already chosen)
"Identical Settings"
Start Scan (acquires overviews) & will end up in -> Detail Mode
Detail Mode:
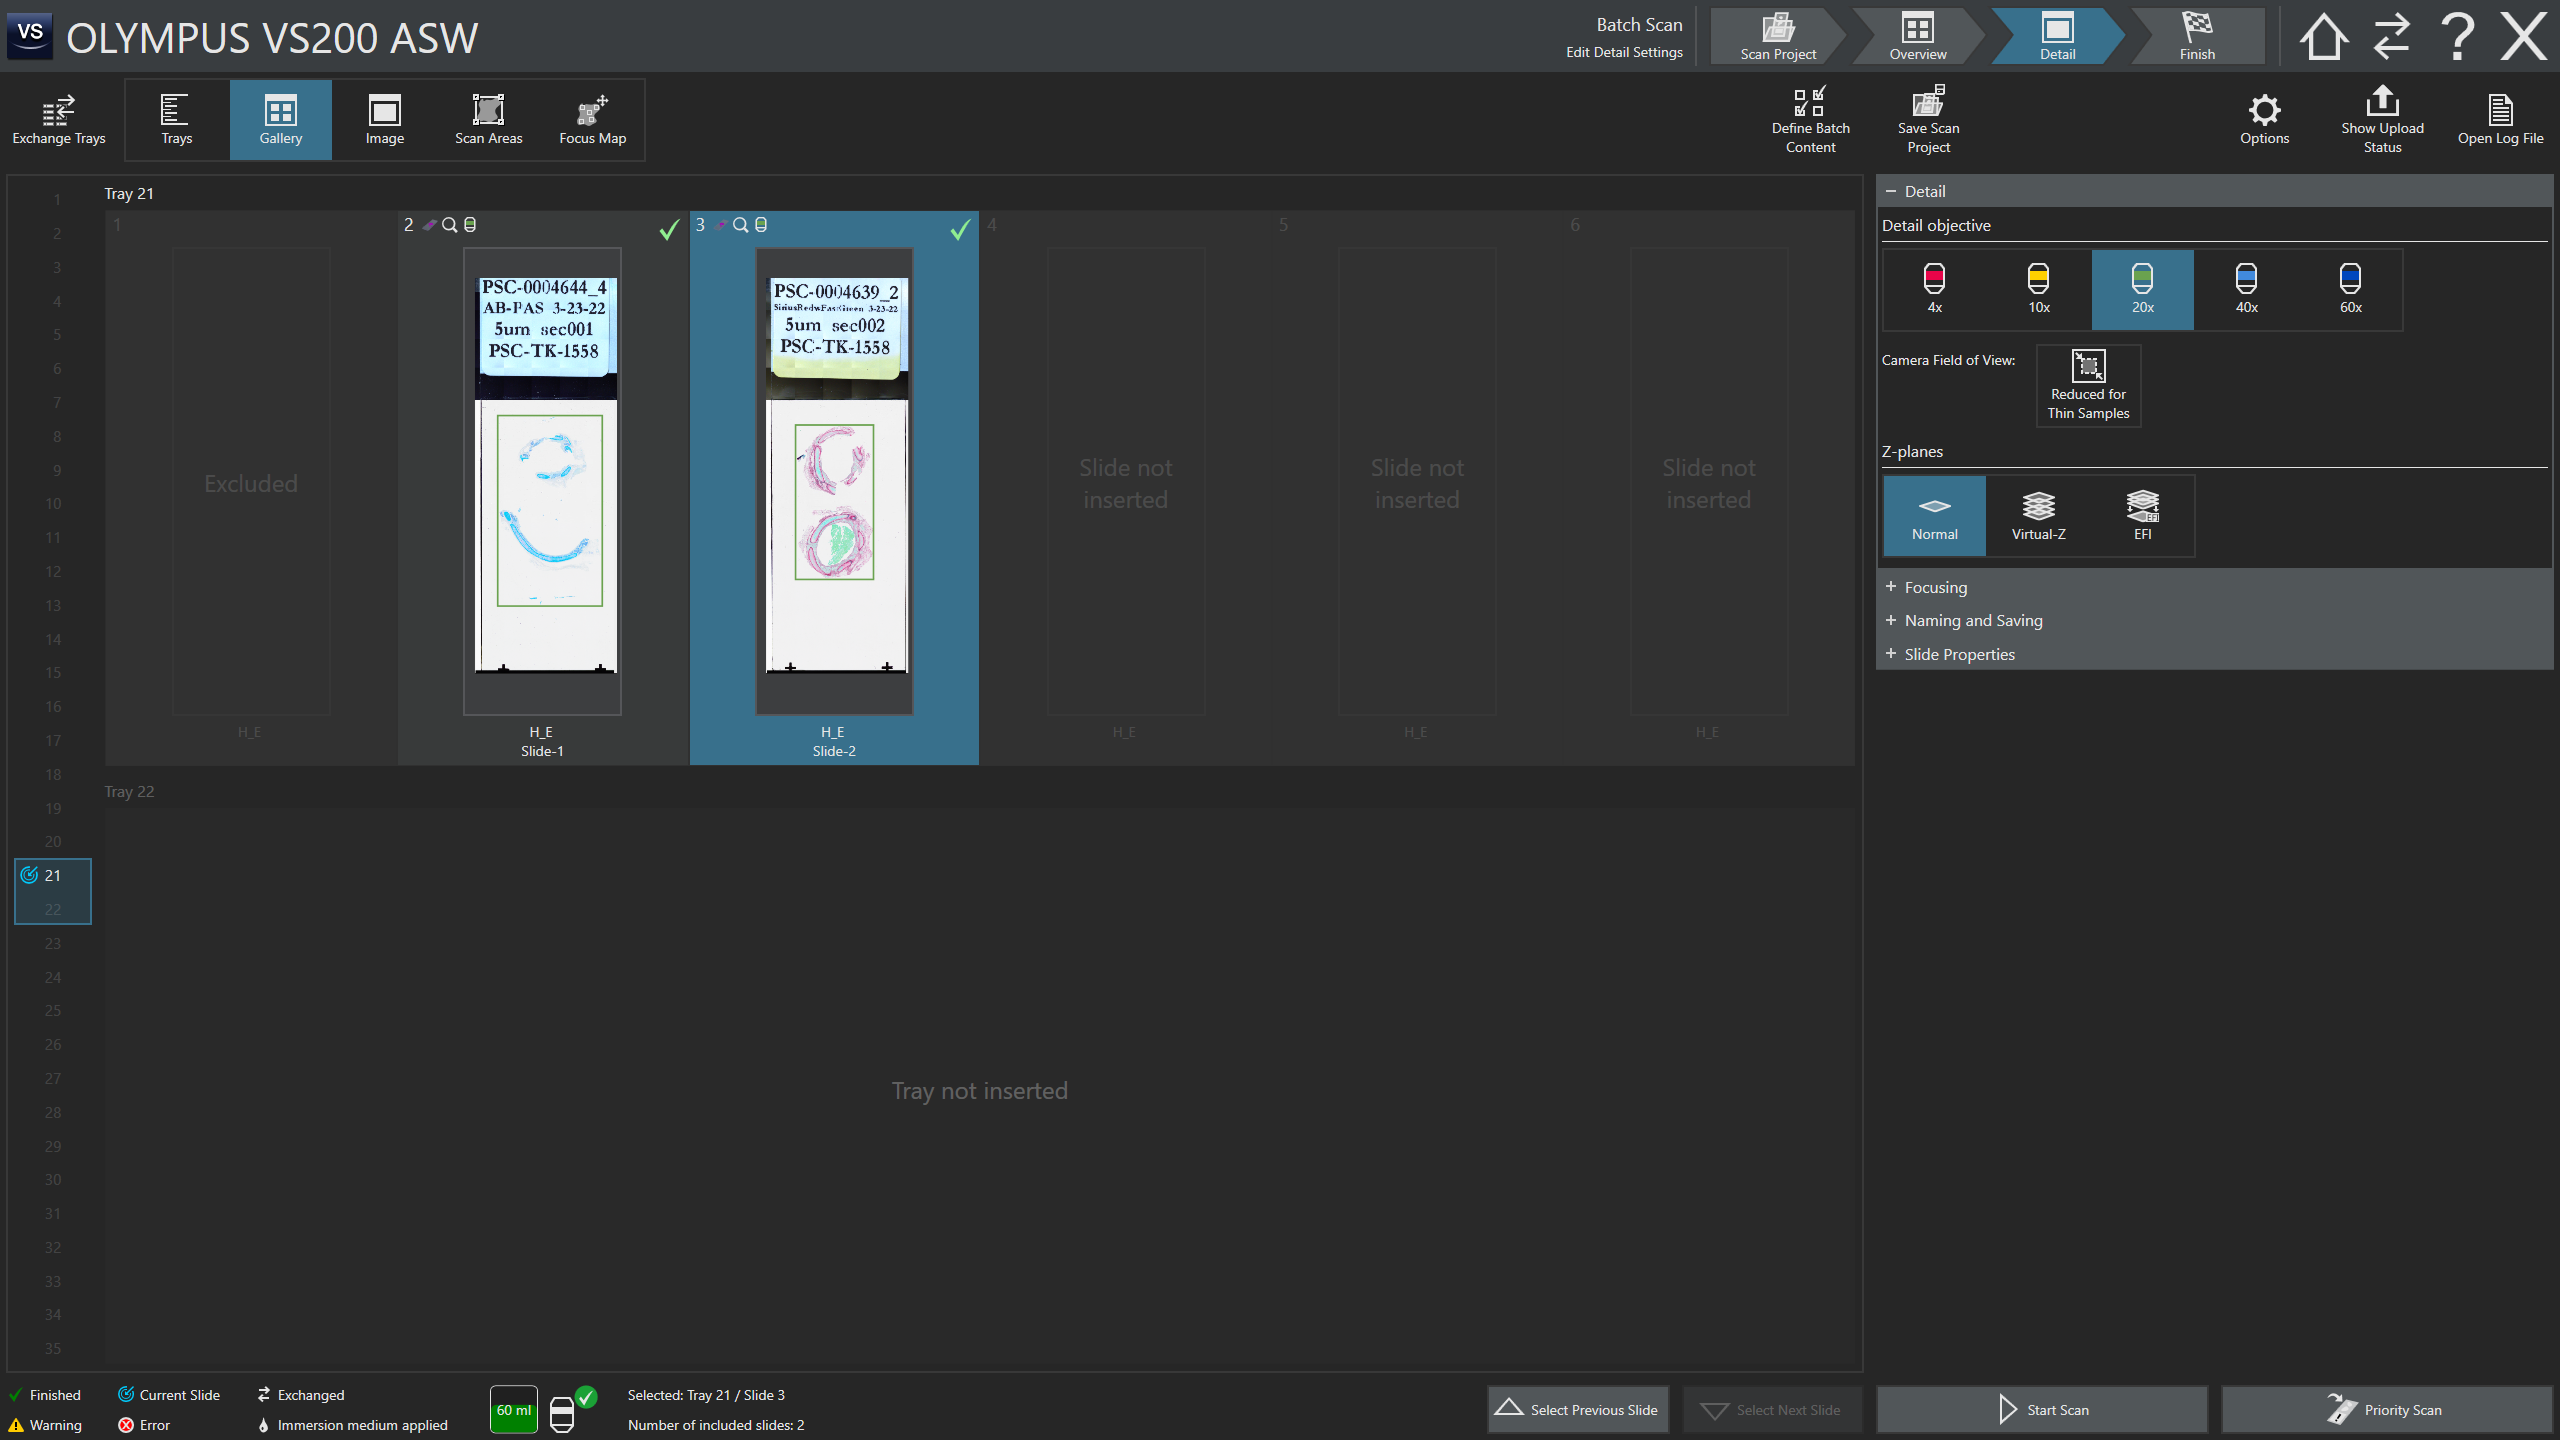
+ Detail
Can change object mag here
Can change |Z-planes" here
+ Focusing
Optionally can change settings
+ Naming and Saving
Optionally can change settings
+ Slide Properties - can change Slide name and other slide
properties (new in version 3.4.1)
Slide Properties - can change Slide name and other slide
properties (new in version 3.4.1)
Optionally can change settings
Can change slide name for each slide based on information in label scans
For each slide:
Check/set Scan areas

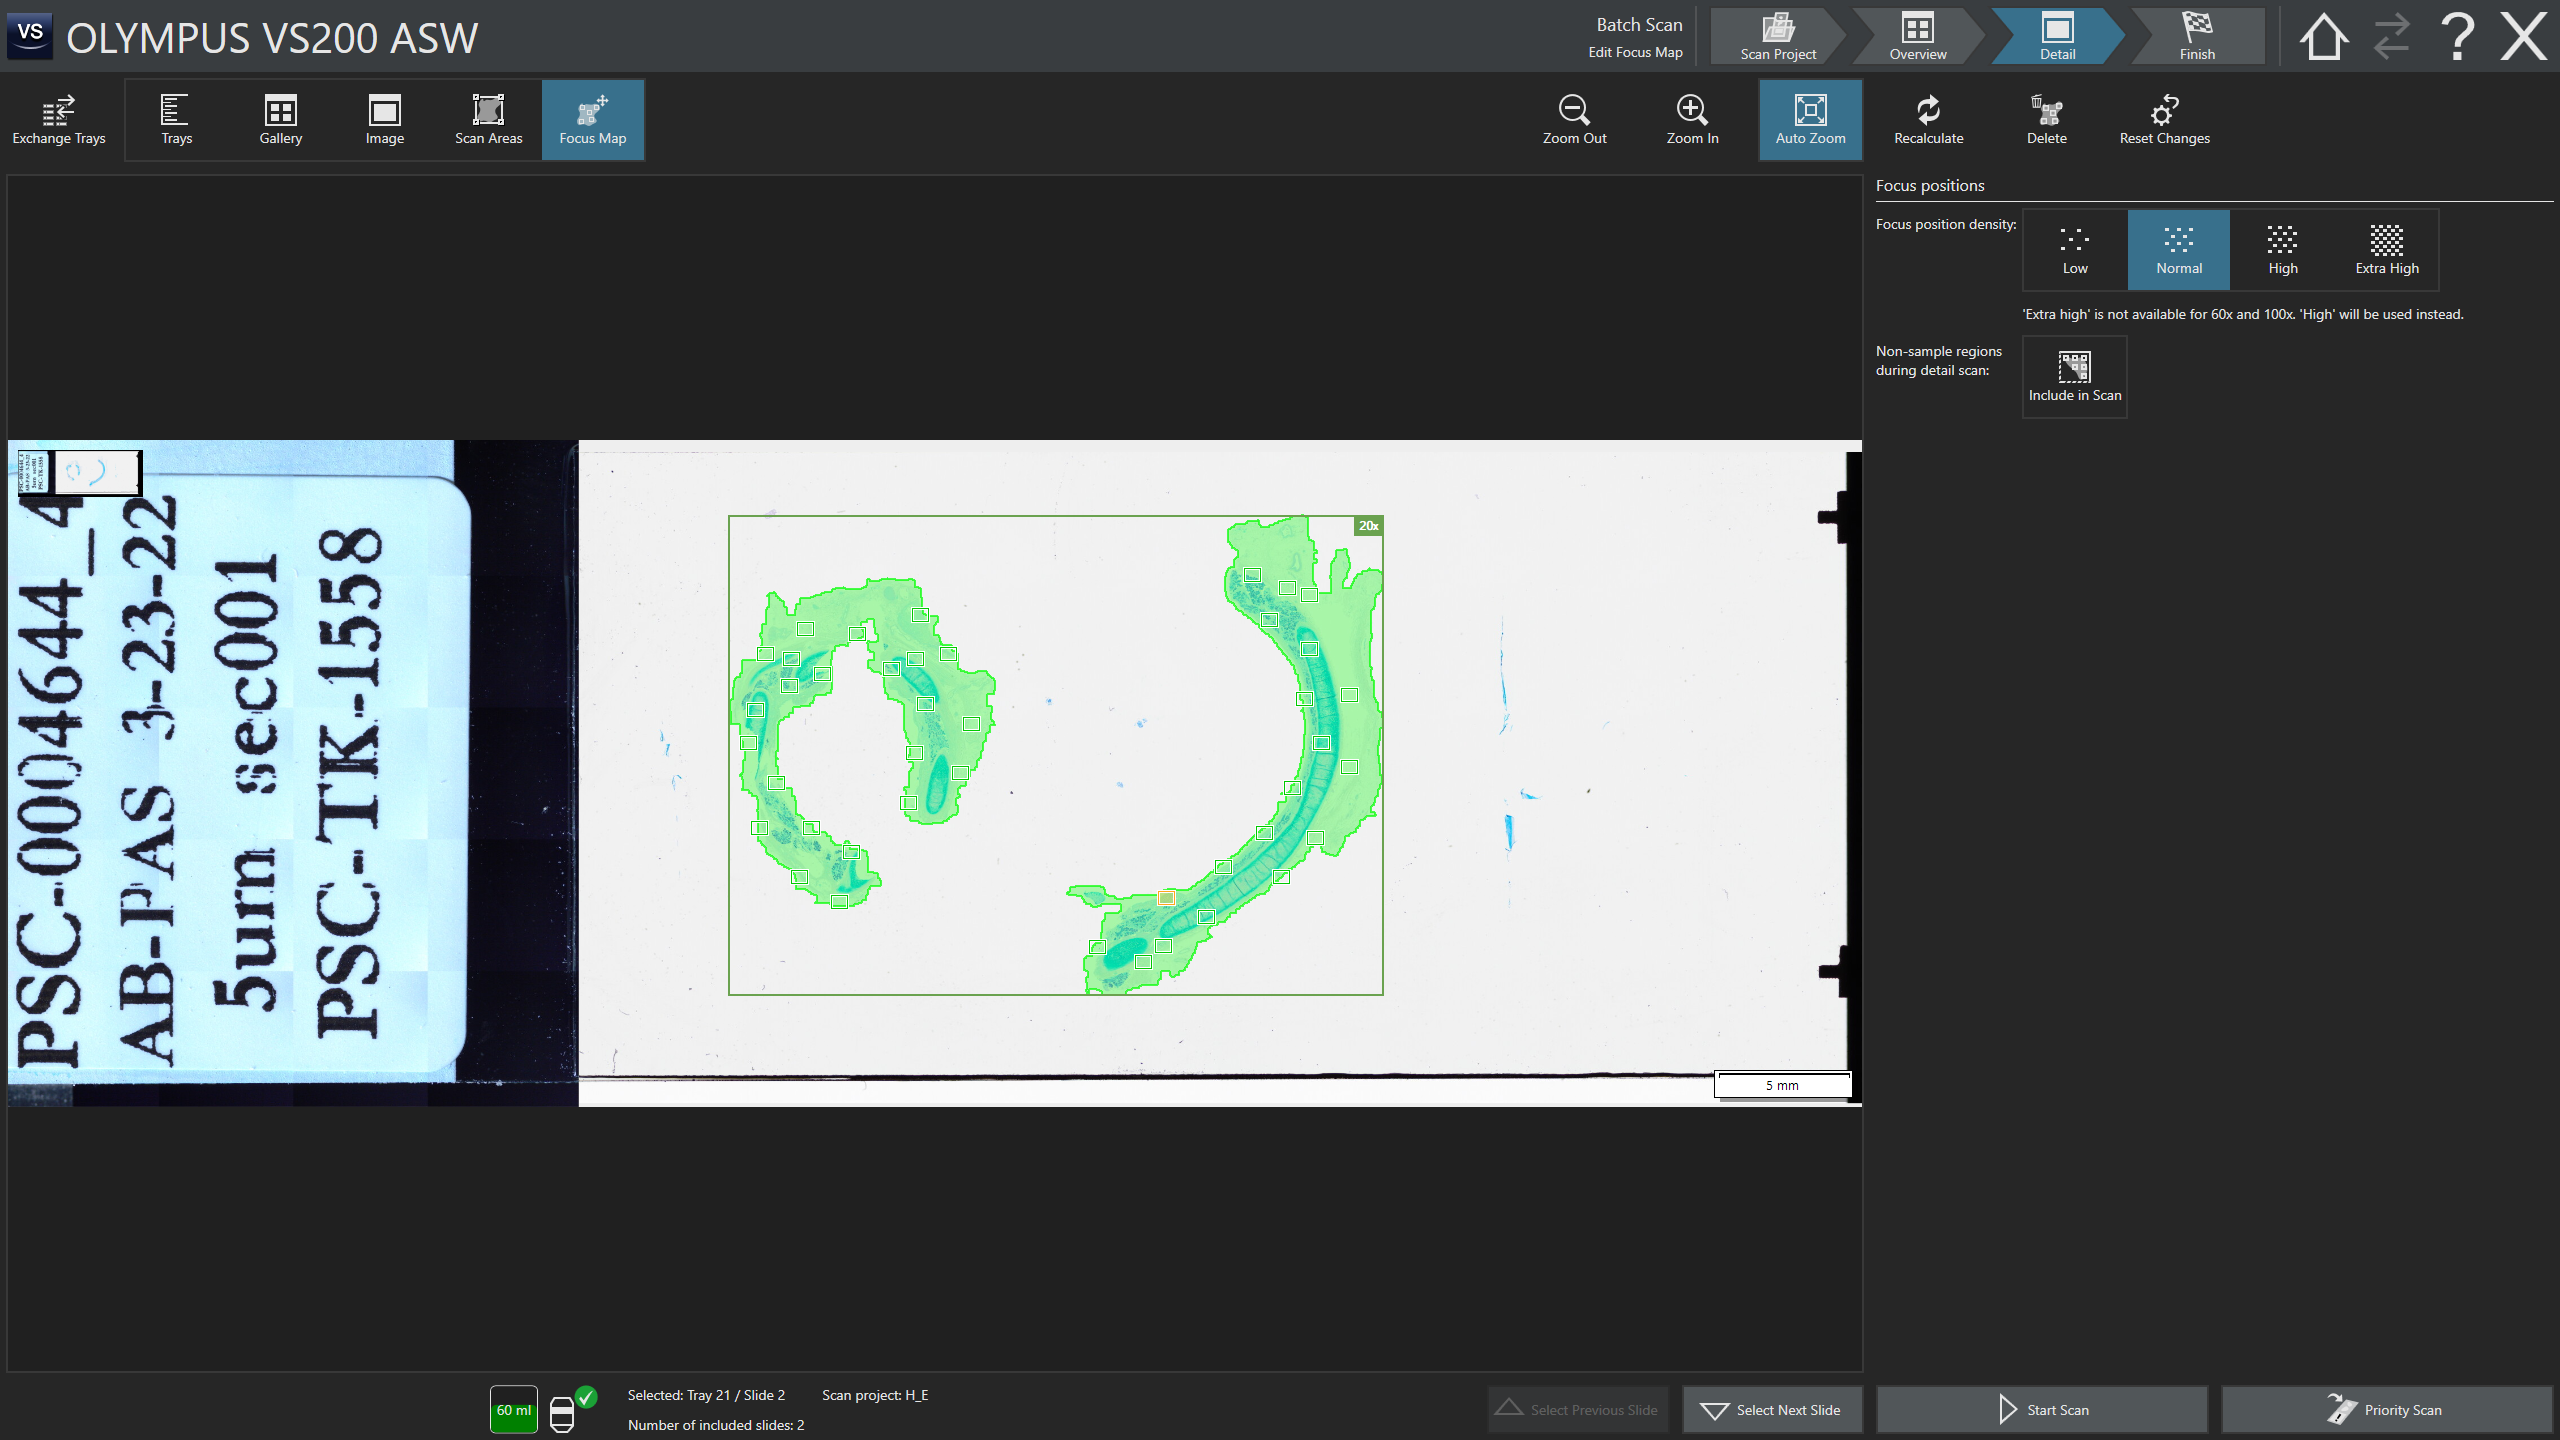
Do Focus maps for each slide
Remove focus square which are over nothing (machine cannot focus on nothing.
Move/remove focus square which are not fill to ~50% with tissue
Could change "Include in Scan" to on or "Include in Focusing" to on
Start Scan
 scanning
in progress
scanning
in progress
Can check scans by double clicking on slide when scan completed or even during scan
Click on "Return to scanning"
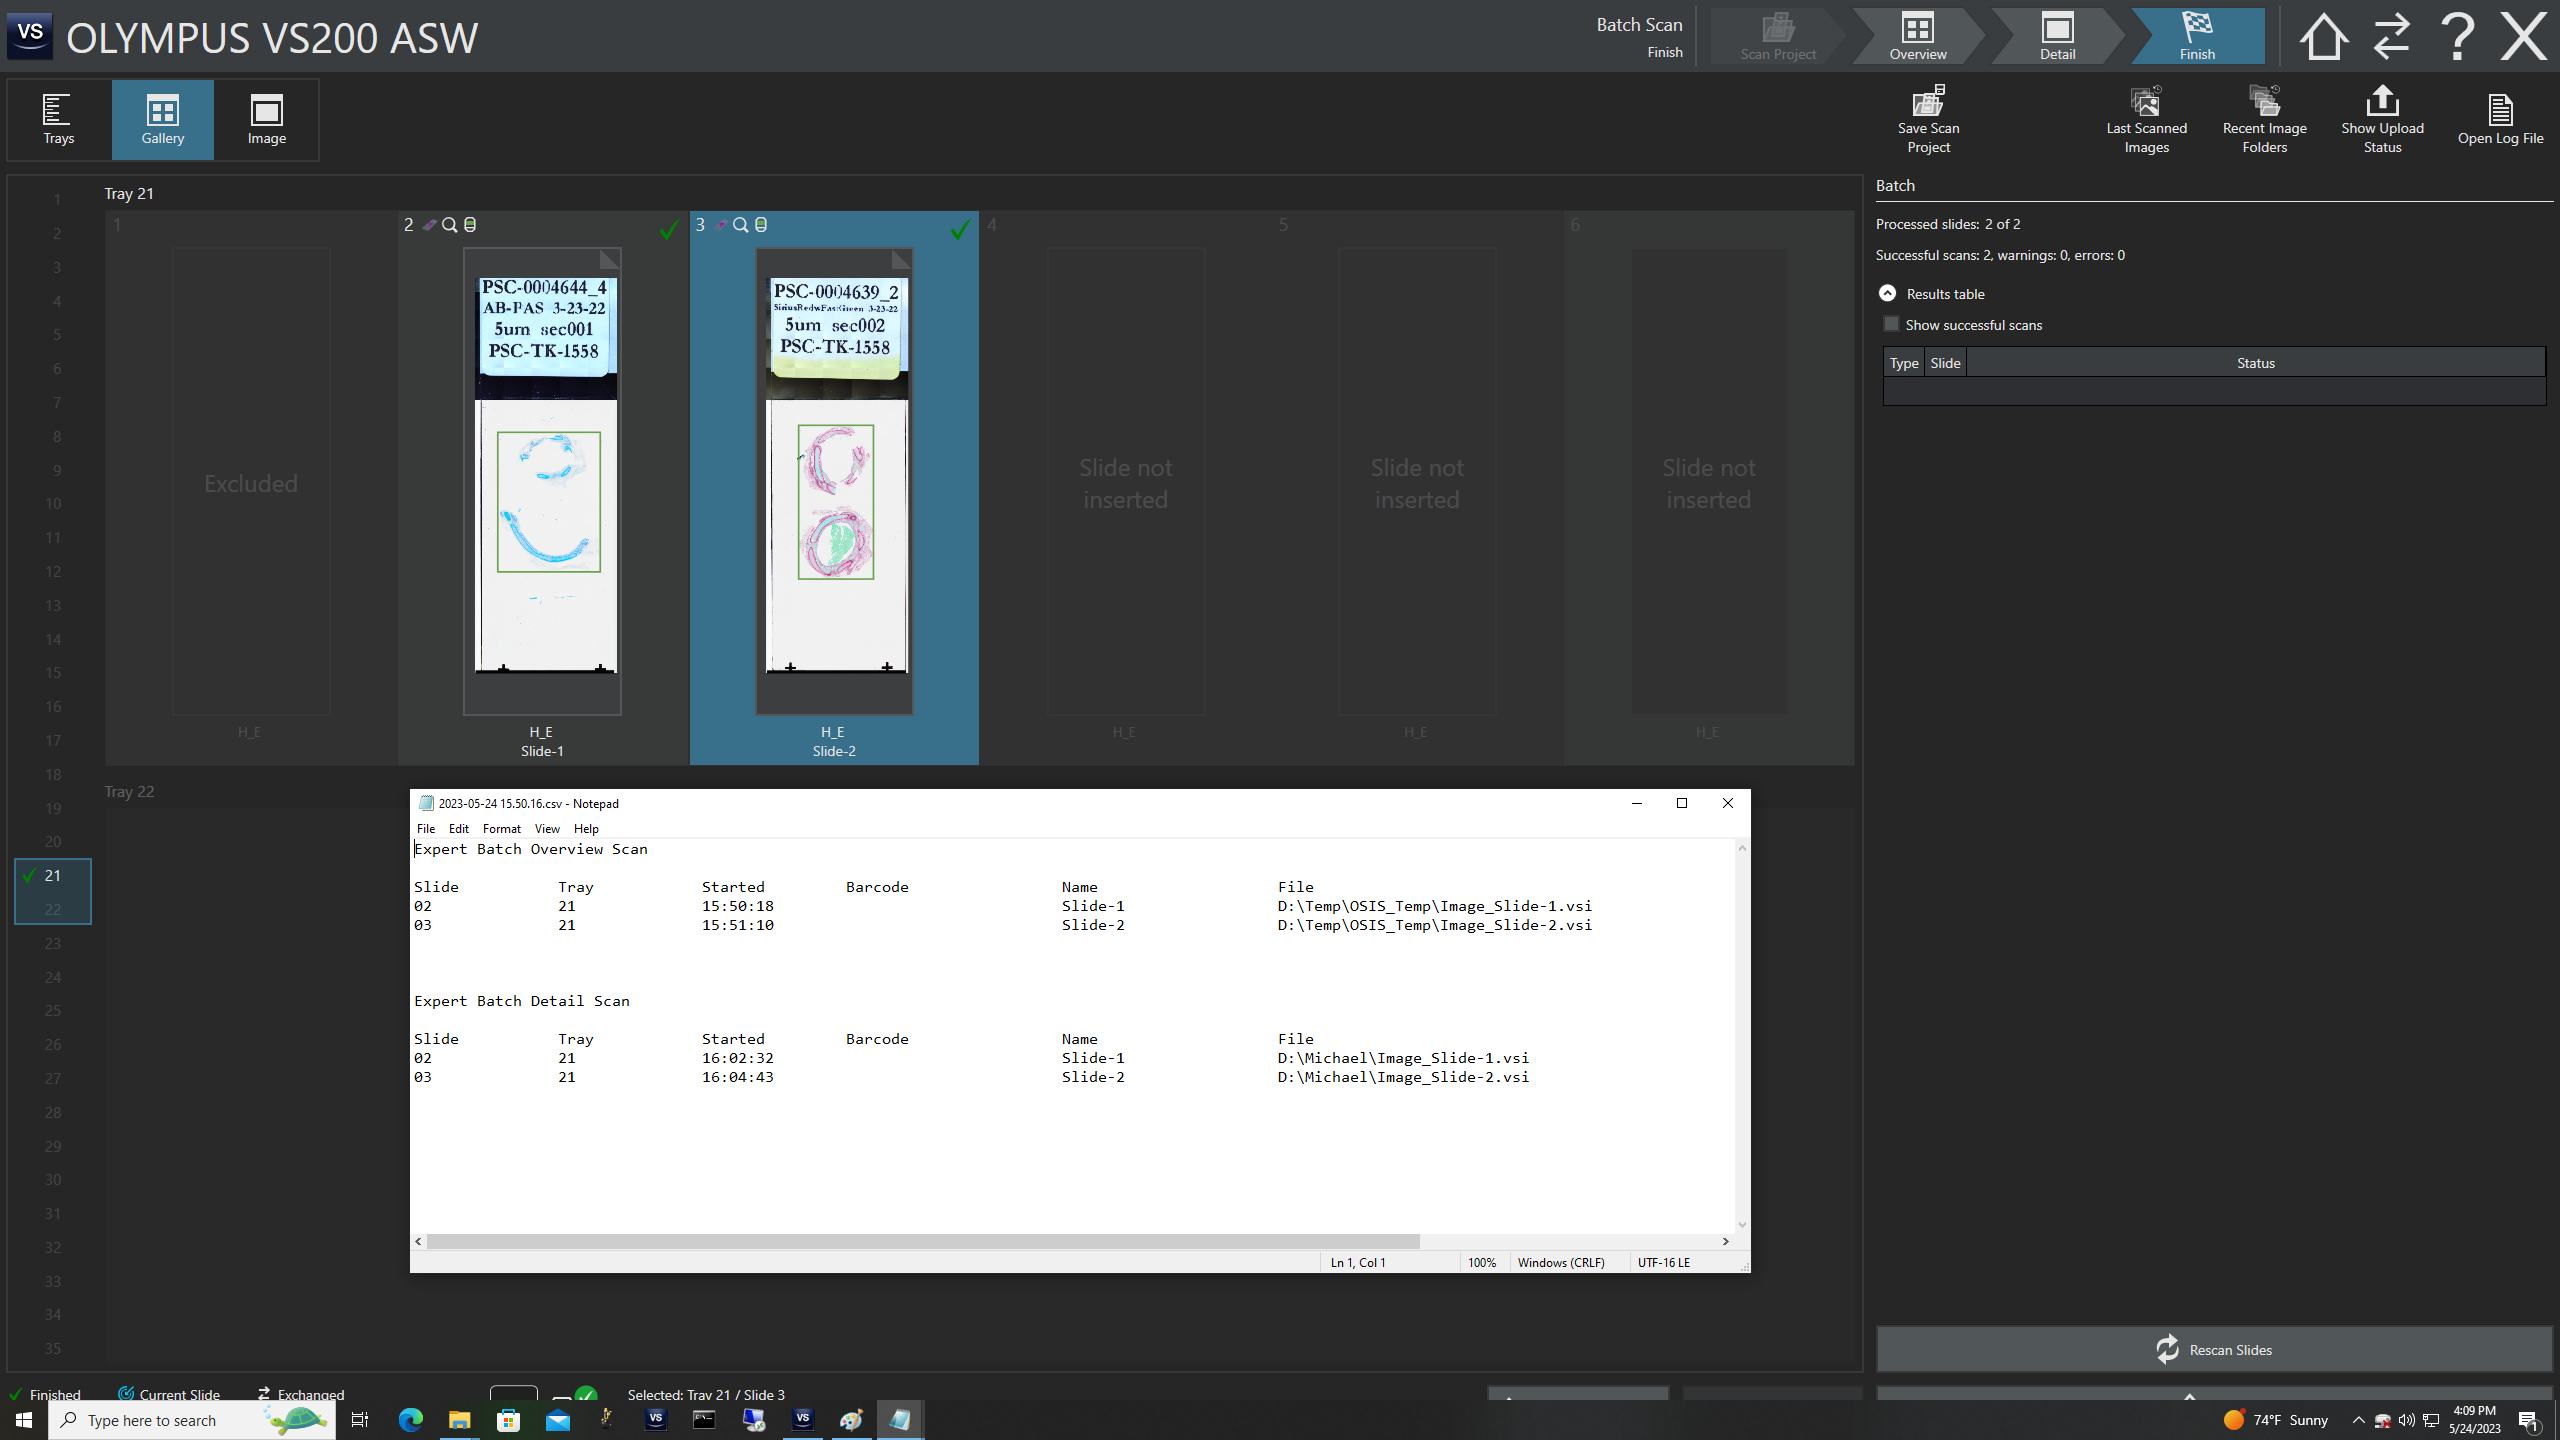
Can open "Open Log File" to check on slide scan completion progress
Finish Mode:
(again) Can check scans by double clicking on slide when scan completed or even during scan
Hit Home on lower right when done.
Back to Home Screen: